Saturday, December 29, 2012

Parker House Rolls


Have to try this rolls whenever I see the recipe for Parker House rolls.  I'm imagining soft and fluffy rolls, warm and buttery.  And I'm not disappointed with this recipe.  It's a bit time-consuming forming this small pillows but of course, any shape will do.  The addition of sea salt at the end is necessary so don't skip it.


The way I did was a bit different than the recipe, there's things I modified to use up what I had at home.  I used SAF Red Instant yeast because that's the one I kept in my fridge; this way I skipped step number 1, i.e. proofing the yeast.  The quantity for using SAF Red Instant yeas is 2 teaspoons and it's added with egg.  Bread flour substituted all-purpose flour.  I added the water used for proofing yeast to my milk and then proceeded with the rest of the steps.

The next day I warmed rolls and ate it with homemade strawberry jam given by a friend.  It's oh, so good.


Parker House Rolls


Makes 36


1 envelope active dry yeast

1/4 cup water

1 cup whole milk

1/4 cup vegetable shortening

3 Tablespoons sugar

1 1/2 teaspoon kosher salt

1 egg, at room temperature

3 1/2 cups bread flour

1/4 cup unsalted butter

Flaky sea salt, such as Maldon


In a small bowl, whisk the yeast in 1/4 cup warm water (110°-115°).  Let stand for 5 minutes.

Heat milk in a small saucepan over medium heat until just warm.  Combine shortening, sugar, and salt in a large bowl.  Add warm milk; whisk to blend, breaking up shortening into small clumps (it may not melt completely).  Whisk in yeast mixture and egg.  Add bread flour; stir vigorously with a wooden spoon until dough forms.  Knead dough with lightly floured hands on a lightly floured surface until smooth, 4 to 5 minutes.  Transfer to a lightly oiled bowl; turn to coat.  Cover loosely with plastic wrap.  Let stand at room temperature until doubled, about 1 1/2 hours.

Preheat oven to 350°.  Melt butter in a small saucepan.  Lightly brush a 13x9" baking dish with some melted butter.  Punch down dough; divide into 4 equal pieces.  Working with 1 piece at a time, roll out on a lightly floured surface into a 12x6" rectangle.

Cut lengthwise into three 2"-wide strips; cut each crosswise into three 4x2" rectangles.  Brush half of each (about 2x2") with melted butter; fold unbuttered side over, allowing 1/4" overhang.  Place flat in 1 corner of dish, folded edge against short side of dish.  Add remaining rolls, shingling to form 1 long row.  Brush with melted butter, loosely cover with plastic, and chill for 30 minutes or up to 6 hours.

Bake rolls until golden and puffed, 25-35 minutes.  Brush with butter; sprinkle with flaky sea salt.  Serve warm.


Source:  The Fannie Farmer Baking Book, 1984.

Monday, December 24, 2012

Christmas Greeting


Merry Christmas dear readers!


This is the second Christmas cookie I made with the help of my son.  He actually picked it out about a month ago because it looked so cute.  Making this type of cookies was like playing with playdough :)

Snowball Trees


Makes about 36 cookies


1 cup unsalted butter, softened

1/2 cup granulated sugar

1 tablespoon milk

1 teaspoon vanilla extract

2 1/4 cups all-purpose flour

Green paste food coloring

1 recipe Powdered Sugar icing (below)

Red & green or multicolor confetti sprinkles


In a large bowl beat butter with an electric mixer on medium to high speed for 30 seconds.  Add granulated sugar.  Beat until combined, scraping sides of bowl occasionally.  Beat in milk and vanilla until combined.  Beat in as much of the flour as you can with the mixer.  Using a wooden spoon, stir in any remaining flour.  Remove 1/2 cup of the dough.  Tint the remaining dough with green food coloring.

Preheat oven to 325°.  For each cookies, use the green dough to shape ten 1/2-inch balls.  On an ungreased cookie sheet arrange balls in a row of four, topped by a row of three, then two, then one on top.  As you arrange balls, gently press them into each other.  Use the plain dough to make a 3/4-inch ball; place it at the bottom of the tree for a trunk.  Repeat with remaining dough, leaving 2 inches between cookies.

Bake for 10 to 12 minutes or until edges are light brown.  Cool on cookie sheet for 2 minutes.  Carefully transfer cookies to a wire rack; let cool.

Pipe or drizzle Powdered Sugar Icing back and forth over cookies to look like strings for lights.  Add sprinkles to icing for lights.  Let stand until icing sets.


Powdered Sugar Icing

In a medium bowl stir together 4 cups powdered sugar, 1 teaspoon vanilla, and enough milk (3 to 4 tablespoons) to make icing piping or drizzling consistency.


To store:  Layer cookies between sheets of waxed paper in an airtight container; cover.  Store at room temperature for up to 3 days or freeze for up to 3 months.


Source:  Better Homes and Gardens Holiday Baking 2011.

Sunday, December 23, 2012

Cream Cheese Shortbread with Toasted Kenari Nuts


I don't have a bake-a-thon this Christmas but I managed to bake two extra cookies today.  The first one is this Cream Cheese Shortbread with Toasted Kenari Nuts.  The inspiration was from a book I borrowed from the library, One Girl Cookies by Dawn Casale and David Crofton.  Their book has good reviews everywhere and I wanted to try out some of the recipes.


Kenari nuts is indigenous nuts from Southeast Asian islands, particularly Eastern Malaysia and Indonesia.  I grew up eating kenari nuts, or also known as pili nuts, in a variety of baked goods.  The shape of the nuts is similar to almonds but the taste is actually closer to macadamia nuts.  Whenever I have a chance to go back to Indonesia, I make sure I bring some home because it's hard to find here or else, the price will be exorbitant.


This cookies has great texture; short of crumbly but holds together well when baked.  The amount of sweetness is right on and I can taste the tanginess of cream cheese as well.  Toasting the nuts enhance the flavor altogether, it isn't overpowering at all.  I think this sort of cookies are perfect nibbles for before Christmas day; in fact, I can't guarantee they're gonna be here at all in 2 days!


Cream Cheese Shortbread with Toasted Kenari Nuts


Makes about 36 cookies


1 cup kenari nuts (substitute with walnuts)

2 cups all-purpose flour

1 teaspoon table salt

12 tablespoons (1 1/2 sticks) unsalted butter, at room temperature

4 ounces cream cheese, at room temperature

3/4 cup sugar

1 teaspoon vanilla extract


Preheat oven to 350°.  Place kenari nuts (or walnuts) on a baking sheet and toast them in the oven for 8-10 minutes.  Let the nuts cool (leave the oven on).  When the nuts are cool enough to handle, put them in a food processor and pulse 2 or 3 times, until all of the large pieces have been chooped.

In a medium bowl, whisk together the flour and salt. Add the chopped kenari nuts, and stir to combine.

In the bowl of an electric mixer fitted with the the paddle attachment, beat together the butter, cream cheese, and sugar on medium speed until the mixture is light yellow and fluffy, about 3 minutes.  Scrape down the sides of the bowl with a rubber spatula.  Add the vanilla and mix on medium speed for 1 minute.  Reduce the mixer speed to low, add the flour mixture, and mix for 20 seconds.  Take the mixing bowl off the mixer and finish mixing the dough with a rubber spatula.

Scoop out a small round of dough, about 1 1/2 tablespoons in size.  Roll the scoop into a ball, place it on a parchment paper-lined baking sheet, and gently pres the ball.  Repeat, leaving 1 inch between cookies

Bake the cookie for 14 to 16 minutes, until they are light brown around the edges.  Transfer the cookies to a wire rack and let them cool.


Source:  adapted from One Girl Cookies by Dawn Casale and David Crofton

Monday, December 17, 2012

Annoyed

To my readers: I just discovered yesterday that new & old post links from my food blog are being directed to adult content websites when seen on mobile devices. The same thing will happen if you're to search my blog's name using mobile devices, you're going to be redirected to those same websites. But if you access the links from home computer, they're working fine and will link back to my food blog.

I'm currently working to solve this problem soon but don't know the definitive answer yet. I apologize to anyone who's encountered the problem, I've no idea how long has it been doing it. I'm mad & disappointed that this could happen to my blog.Thank you for being supportive during this misshapen--Eliza


Well, there it is.  It's not the end of the world but I feel helpless now because this type of technical difficulties is beyond me and I've to wait for someone to fix it for me.  I don't like waiting but I need to be patient.  I'm just hoping it can be resolved and won't happen again.

While this thing is brewing in the background, I did some baking last Sunday.  I baked gingersnaps cookies for a friend and hand pies for my family.  The house smelled so good when the gingersnaps were cooling on the racks.  I didn't have a chance to snap pictures of it so I won't share the recipe.  Perhaps the next time I'm making it again, I will write it down here.  As for the hand pies, I used some cranberry-orange relish that was a leftover when I made it for Indulge magazine.  The relish was quite thick, sweet enough, and I thought was a perfect filling for hand pies.  As for the crust, I used store-bought; which I thought wasn't too bad.  As for the shape, well, Christmas is coming soon and what perfect shape than Christmas tree and snowflake.  I got about 8 hand pies by using double pie crust.  Not bad, eh?  So here they are...until next time!


Saturday, December 15, 2012

Holiday Indulge


This summer I once again had to do articles for Zupan's Indulge magazine.  The articles were for fall/winter edition of the magazine and let's just say I had a lot to tackle :)  I had to cover in-season produce and also an article about food and travel in Indonesia.  Now, this wasn't as easy as people would have thought because Indonesia has such diverse ethnicities and foods.  A  few weeks later, a breath of relief once everything's all done and submitted.


I just received the issue in the mail and it was awesome to see the articles printed alongside the recipes.  And my crown roast photo for Carlton Farm graces the  back cover of the magazine :)  My 2012 was a productive year for me for sure.


If you live locally, you can pick up the Indulge magazine at any Zupan's Market!

Thursday, November 1, 2012

Kabocha Squash Muffins


Entering a blustery first day of November, the rain was relentless today.  But towards the late afternoon, the sun peeked for a few hours among the black clouds.  The color of changing leaves looks so pretty.  I've been observing the red, yellow, and brown of the scenery and I felt that autumn is a lovely time of the year.  It also helps that the temperature is surprisingly mild this year, I hardly need to turn up the heater at home.  And look, the moon is visible while I'm writing...

Just when I think that I will have time to savor the slowness of my life's pace, I'm asked to do assignments.  Excited?  Sure.  Every assignment is a blessing and I like to do them when I've plenty of time to research, think, and execute.


Lately, I've grown to love kabocha squash for its naturally sweet taste and smooth texture.  My mom has cooked thin slices of kabocha and dipped them in tempura batter for a few times already.  They came out crispy on the outside and tender inside, and I could eat all of them; nothing for the rest of my family.  Yes, I'm selfish that way when it comes to food that I love.

Last Saturday I finally made a batch of kabocha squash muffins.  These are incredibly delicious, especially when they're still warm because they're immediately coated with melted butter and rolled in cinnamon-nutmeg sugar coating.  Oh, these smell not unlike snickerdoodles...  And no, I'm not selfish to have the recipe for myself, I'm happy to share it here.


Kabocha Squash Muffins


Yields 12 muffins


2 1/2 cups all-purpose flour

1 1/2 teaspoon baking powder

1/2 teaspoon salt

1/4 teaspoon baking soda

1/4 teaspoon ground nutmeg

1/3 cup buttermilk

1/3 cup milk

1/2 cup kabocha squash puree

1 teaspoon vanilla extract

1 stick unsalted butter, at room temperature

3/4 cup dark brown sugar

2 eggs, at room temperature


Cinnamon-nutmeg coating


1/2 cup sugar

2 teaspoon ground cinnamon

1/4 teaspoon ground nutmeg

1/2 stick unsalted butter, melted


Preheat oven to 350°; coat a muffin pan with nonstick cooking spray.

Whisk flour, baking powder, salt, baking soda, and nutmeg in a medium bowl.  Blend buttermilk, milk, squash puree, and vanilla extract in a small bowl.

Cream butter and brown sugar together in a bowl with an electric mixer.  Add eggs, one at a time, beating well after each addition.  Alternately stir dry and wet mixtures into the butter, starting and ending with the dry; do not overmix.  Fill muffin cups 1/2 full and bake 25 minutes, or until a toothpick inserted in the center of a muffin comes out clean.

Combine sugar, cinnamon, nutmeg in a shallow dish.  When cool enough to handle, yet still warm, remove muffins from the pan, brush them completely with the melted butter, and roll in sugar mixture to coat.  Serve warm.


Source:  adapted from Cuisine at Home magazine, October 2006.

Tuesday, October 9, 2012

Caramelized Plum and Rosemary Polenta Pound Cake


I've always loved Italian plums ever since I ate a handful of them off of someone's homegrown tree.  They were ripe on the tree and that's when it's the best time to eat them.  I plucked one and bit into it, instantly I love how firm and sweet was the flesh.  Since then I'm always on the lookout for good Italian plum.  I found that those are sold in regular store are inferior to any homegrown plums.

Then while waiting for a plum fairy to come my way, I was given a surplus of Italian plums near the end of summer by one of my dearest friends, and to my joy, they're from homegrown tree.  What a blessing...  I said yes right away not realizing that one couldn't eat all 15 pounds of plums at one time.  I ended up freezing some of them and from a few, I made into this cake.  The cake was a wonderful juxtaposition of tender and crunchy texture of cornmeal, sweet and tart of plums.  The only thing I made different was the size of the pan, otherwise the recipe stayed the same.


Caramelized Plum and Rosemary Polenta Pound Cake


Serves 8-10


½ pound unsalted butter at room temperature, plus more for buttering loaf pan

1½ cups all-purpose flour

1 tablespoon baking powder

1 cup yellow cornmeal

½ teaspoon salt

2 tablespoons finely minced fresh rosemary

Zest of 1 lemon

1 cup sugar

3 eggs, at room temperature

2 tablespoons cognac (or any brandy)


Prepared plums (recipe below)


Butter a 5½x10-inch loaf pan. Line the bottom with parchment paper. Butter paper. Set pan aside.

Preheat oven to 350 degrees.

Sift together flour, baking powder, cornmeal and salt.

Cream together butter, rosemary, lemon zest and sugar until very light and fluffy.

Add eggs to butter mixture, one at a time, beating well after each addition.

Beat in flour mixture, alternating with cognac, just until well-combined. Spoon 2/3 of batter into pan. Evenly distribute one-quarter of prepared plums over batter. Add rest of the batter. Spread remaining fruit over the top and, using a spoon or fork, push pieces down a little.

Bake for 60 minutes or until done, testing with a toothpick after 50 minutes. Cake should be nicely brown, pulling away from the edges of the pan and not too dry. Cool in pan for 10 minutes, then invert cake onto your hand or a rack and quickly re-invert it onto another rack.

Serve warm or at room temperature. (The cake is also delicious sliced and toasted.)


Prepared Plums


6 large plums, pitted and cut into 6-8 wedges each

1/3 cup sugar

Pinch of salt

1 teaspoon finely grated lemon zest

1 teaspoon finely minced fresh rosemary

2 tablespoons cognac (or rum or any brandy)

In a medium saucepan, cook plums with sugar, salt, lemon zest and rosemary over medium heat until fruit is very soft but not falling apart, about 10 minutes. Remove from heat. Add cognac.


Source:  The Wall Street Journal, Food & Drink, by Gail Monaghan

Saturday, September 29, 2012

Lavender Scones


I read the other day about the summer days being over; what that meant was we'd say goodbye to barbecues, picnics, beach outings, tank tops, long vacation, and lazy days.  The list is certainly long, isn't it?  But I get it  and I'm certainly sad about leaving summer as well.  Yet a few days ago when someone gave me a couple of gingersnap cookies, I was left with a wanting of the fall to be here.  I suddenly crave for the flavors of fall: ginger, cinnamon, apples, pears, and pumpkin.  And the beautiful colors of turning leaves.

This post isn't about fall flavors yet, this is about lavender scones that I made to complete a leftover lemon curd.  The scones were soft and tender, and they were required to be consumed warm, out of the oven.  There is a pot of a lavender plant just outside of my kitchen where they are still blooming right now.  Whenever I brush the flowers with a water hose, they exude this fragrant smell.  Faint but just right.  It's the same with the scones; the lavender smell is faint in them but if I get a bite of the dried speck, there's no question it is there.  The lemon curd was a leftover from a batch I made for Zupan's fall/winter edition of Indulge magazine.  It tasted eggy, soft, and zingy from the lemon, but unfortunately I wouldn't be able to post the recipe here yet.  I will update the post when the magazine comes out later.

Lavender lemon scones

Lavender Scones


Makes 16

3 cups all-purpose flour plus more for surface
3/4 cup granulated sugar
1 tablespoon baking powder
1 teaspoon dried lavender buds
1 teaspoon kosher salt
1/2 teaspoon baking soda
3/4 cup (1 1/2 sticks) chilled unsalted butter, cut into 1/4-inch cubes
1 cup plus 2 tablespoons buttermilk
2 teaspoons finely grated lemon zest
1 teaspoon vanilla extract
2 tablespoons sanding or granulated sugar
1 1/2 cups store-bought or homemade lemon curd

Arrange racks in upper and lower thirds of oven; preheat to 425°. Line 2 baking sheets with parchment paper. Whisk 3 cups flour and next 5 ingredients in a large bowl. Add butter; rub in with your fingers until mixture resembles coarse meal.
Whisk 1 cup buttermilk, zest, and vanilla in a small bowl. Add wet ingredients to dry ingredients. Stir until shaggy dough forms.
Transfer to a lightly floured surface; knead until dough forms, about 5 turns. Pat into a 10x6" rectangle. Halve dough lengthwise. Cut each half crosswise into 4 squares. Cut each square diagonally in half into 2 triangles. Divide between baking sheets. Brush with 2 Tbsp. buttermilk. Sprinkle with sanding sugar.
Bake until scones are golden and a tester inserted into the center comes out clean, 13–15 minutes. Transfer to wire racks; let cool. Serve warm or at room temperature with lemon curd.

Source: Bon Appétit, May 2012

Sunday, August 26, 2012

Wajik


I have stock photos of some recipes that I made this summer; one of the is this glutinous rice cake cooked in coconut milk with palm sugar or wajik.  This diamond-shaped cake is known as “wajik” in Bahasa Indonesia because it refers to the shape of it, and it’s traditionally made with lots of palm sugar to get the dark brown color. Screwpine/pandanus leaves are essential to get the right aroma for this dessert, but a little vanilla extract for substitution would be acceptable.  Mine was a little light in color because I used half palm sugar and half dark brown sugar to see if the wajik differed in taste.  So taste wise it was still delicious surprisingly!

Wajik


Serves 4-6


½ lb. glutinous rice

1 cup coconut milk

¾  cup palm sugar, or dark brown sugar

1 Tablespoon granulated sugar

¼ teaspoon salt

1-2 screwpine/pandanus leaf, tied to knots; or ½ teaspoon vanilla extract


Wash and rinse the glutinous rice.  Soak in plenty of water overnight at room temperature.

Drain the rice and place in a shallow heatproof dish.  Steam rice over rapidly boiled water for 20 minutes or just until cooked.  Have ready another shallow heatproof dish, greased lightly with cooking oil on bottom and sides.

Put coconut milk, sugars, salt, and screwpine/pandanus leaves in a wok.  Heat the mixture to almost boiling over medium heat (the edges will start to bubble); stirring constantly to dissolve the sugars.  Do not boil completely because the coconut milk will curdle.

Lower the heat, and add the steamed rice.  Stir constantly until mixture is thick and sticky.  This process will take about 5-8 minutes, and the mixture should be quite gooey.  Turn mixture out onto the prepared dish.  Allow to cool and harden, then cut with oiled knife into diamond shapes or serving-sized pieces.

Thursday, July 26, 2012

Double Chocolate Zucchini Bread


I found these zucchini in my parents' garden Monday afternoon.  Two plants grew healthy this summer in the sunny patch and they're starting to produce yields big enough to enjoy.  My mom couldn't contain her excitement when she saw these babies in her garden, she could hardly wait to pick more of them.

Zucchini


The day I picked those zucchini, I saw a post from King Arthur Flour's Facebook page about the double chocolate zucchini bread.  I was salivating looking at the picture that I determined I would make that the next day.  Even I couldn't contain my excitement about making a zucchini bread!

There're a lot of recipes using zucchini and chocolate but I have to say that this one is one of the best.  The amount of zucchini needed isn't outrageous (I hate grating zucchini), the chocolate flavor is really there, the bread isn't overly dry or wet, the crumb was tight, and the level of moistness is just right.  What I did differently were using half bittersweet chocolate and semisweet chocolate in the bread and save 1/4 cup to sprinkle on top of the bread; otherwise everything stayed the same.  Baking time was slightly reduced for my oven, it was around 60 minutes that the bread was done.  And I smeared some Nutella on my bread, mmm....

Chocolate Zucchini Bread


Chocolate Zucchini Bread


A bread like this makes me smile; it makes me think of a wonderful summer weather, the harvest from our own garden, and how connected we are to the food we grow ourselves.


Double Chocolate Zucchini Bread


Yield one 8 1/2" x 4 1/2" loaf


2 large eggs

1/3 cup honey

1/2 cup vegetable oil

1/2 cup brown sugar

1 teaspoon vanilla extract

1 teaspoon salt

1/2 teaspoon baking soda

1/2 teaspoon baking powder

1/2 teaspoon espresso powder, optional

1/3 cup cocoa powder or Dutch-process cocoa

1 2/3 cups all-purpose flour

2 cups shredded, unpeeled zucchini, gently pressed on a colander over a bowl or sink to release some of its moisture

1 1/4 cups chocolate chips (a combination of bittersweet and semisweet), save the 1/4 cup for sprinkling on top of bread


Preheat the oven to 350°F; lightly grease an 8 1/2" x 4 1/2" loaf pan.

In a large mixing bowl, beat the eggs, honey, oil, sugar, and vanilla until smooth. Add the salt, baking soda, baking powder, espresso powder, cocoa, and flour, mixing until well combined. Stir in the zucchini and chocolate chips. Pour the batter into the prepared pan.  Scatter the reserved 1/4 cup of chocolate chips on top of the batter.

Bake the bread for 65 to 75 minutes, until the loaf tests done (a toothpick or cake tester inserted into the center will come out clean, save for perhaps a light smear of chocolate from the melted chips).

Remove the bread from the oven, and let it cool for 10 to 15 minutes before turning it out of the pan onto a rack.  Cool completely before slicing; store well-wrapped, at room temperature.

Wednesday, June 27, 2012

Summer Ice Pops: Strawberry Mint


So here's the recipe for the strawberry pops. Made with mint simple syrup and fresh Oregon strawberries, the pops look so bloody red! They taste amazing though, the mint is very subtle, the strawberries really shine.  To mix two different flavors, freeze half of the first mixture about 1 hour, then add the second mixture.  Now I'm never gonna go back buying store bought ice pops anymore, this is way healthier and fresher!


Oregon strawberries


Mint simple syrup


Liquid state


Strawberry mint ice pops


Summer pops

Strawberry Mint Ice Pops


Makes approximately 10 3 fluid ounce pops

1 cup sugar
1 cup water
1-2 pounds strawberries
4-5 fresh mint leaves

To make simple syrup, gently heat sugar and water, stirring occasionally until sugar dissolves. Steep the syrup with mint, remove from heat; let cool.

Rinse and mash strawberries with a potato masher until smooth. Add 1/3-1/2 cup simple syrup for every cup of pureed syrup, taste as you go, adding more fruit or simple syrup as needed. Note: keep it a bit sweeter because the pop tends to lose sweetness when frozen.

Pour mixture into molds, add stick, and freeze.

Source: adapted from People's Pops by Joel Horowitz and Nathalie Jordi

Sunday, June 24, 2012

Summer Ice Pops: Pineapple Ginger Coconut


Okay, so when a grocery store had a sale on pineapples, what do you do?  If you're like me, you'd run to the store and bought more than one pineapple for sure.  Fred Meyer had $1/pineapple this week so I had to have it; in my household, pineapple is a favorite fruit.  I bought one for eating fresh and another one for making pineapple pops.  I have ready a ginger simple syrup in my fridge, something that now I know it's so easy to make, I must have some ready in the fridge for making something sweet.

ginger simple syrup-1


fresh pineapple-1


pineapple ginger coconut pops-1


pineapple ginger coconut pops-1-3


My flavor combo of this week for the pops is pineapple, ginger, and coconut.  The recipe is a very easy one:  I put one whole pineapple in the blender, then I combined it with ginger simple syrup to make it slightly sweeter than normal.  The sugar will mellow when the pops are stored in the freezer, so you should make your pops always a tad too sweet.  The recipe for the simple syrup here will be most likely used all because it's thicker than a regular simple syrup.  Since I have not bought any popsicle molds, I had to resort using a 3-ounce paper cups again (like I did with this banana blueberry gelato).  I really don't mind using the paper cups though I'm putting popsicle mold in my wish list nevertheless.  I see myself making pops every summer now.

I like to steep the ginger in my syrup for a day or two so the ginger really sings in the pops :)  There's a bit of heat from the ginger that's refreshing yet it's still subtle enough, and with toasted shredded, sweetened coconut in the pops, these add texture and bring more of that tropical island kick to the pops.

frozen pineapple ginger coconut pops-1


frozen summer pops-1-2


strawberry pineapple pops-1-3


And along with these pops, I made strawberry pops that has been mixed with mint simple syrup which was also fabulous.  On some cups I put these two together and they came out very pretty and vibrant.  The recipe for the strawberry pops will be in the next post, don't you worry.  Now, who don't want to have these all summer long?!

Pineapple Ginger Coconut Ice Pops


Makes about 10 3-fluid ounce pops


Ginger Simple Syrup:

1/2 cup water

1 cup sugar

5-6 thin slices, peeled, fresh ginger

Combine water, sugar, and sliced ginger pieces in a small saucepan over medium heat.  Heat until sugar dissolves, stirring occasionally.  Keep syrup in a refrigerator after it cools down.  It is best to make this one or two days ahead because the flavor will be more pronounced.


Pineapple mixture:

1 medium size pineapple, peeled, cored, and cut into 1-inch pieces


About 1 cup toasted, shredded sweetened coconut


Put pineapple pieces in a blender and puree until smooth.  Add syrup to pureed pineapple, 1/2 cup at a time; make sure the mixture is very sweet.  Pour pineapple mixture into cups or ice pop molds, add stick when partly frozen if using paper cups.  Freeze until solid.

For a variation:  add toasted coconut in the cup/mold and after the cup/mold is filled.

Tuesday, June 19, 2012

Start of the Summer


Where has the sun gone today?  It was drizzling, the sky turned grey, and it was cold this morning that it dampened our spirits a bit.  My son and I were to go on a bike ride right after breakfast but since it was drizzling, we decided that we would bake cookies first.  My son has shown a great interest in cooking and baking that I think this summer he's going to do them more often.

The young baker


He chose a cookie recipe that was easy enough for him to do which was a thumbprint cookies.  I have a strawberry-lemon marmalade and peach-cherry-almond conserve that I think are perfect for the cookies.  We did it good today; he was grinning from ear to ear posing before his creation.  Afterwards, we went bike riding to the park. This bike ride has become our form of exercise of the day that I want to keep it all summer long. I sometimes even add a 4-mile walk at the track, just like what I did today.

strawberry pie-1


On my last post I wrote that I made strawberry pie, but sadly that pie didn't turn out as good as I thought.  The filling was weeping out of the crust when I cut a slice.  I was very disappointed.  My feeling was perhaps I left the strawberries too long with the sugar and cornstarch and it became too juicy.  I should have used ClearJel for the filling, oh well...  From the outside, it had a promising look; the crust was tender and crumbly.  But no matter how bad it looks in the inside, it was great eaten with homemade whipped cream.  My son suggested buying Reddi-Whip while we're buying groceries, but I couldn't bear buying it since I knew whipping heavy cream wasn't hard to do!

Leftover crepes, strawberries & whipped cream


Since I have some leftover crepes, they became my son's power breakfast this morning; crepes, strawberries, and whipped cream.  Hmmmm...delish!

Sunday, June 17, 2012

Strawberry-Banana Crepe Cake

Strawberry season is officially here!

From my parents' garden, we harvested small but big in taste strawberries.  The plants are still producing quite a big yield every summer, enough for a week's consumption.  Every day my mom would be in the backyard harvesting the berries.  I have a box of strawberry plants as well in my backyard but due to lack of sun, they never really produce enough berries for us.  I'm thinking of replacing those with something else in the future.  But my herbs thrive in the box garden well enough that I'm happy to have fresh herb every spring to use in my kitchen.

Yesterday I decided to pick strawberries at Lee Farms in Tualatin.  My plan was to make strawberry jam and to freeze the rest that we can't eat anymore.  Last year I made some jams that I ended up giving to friends and family that I didn't have enough for myself.  This year I want all for myself and those who want it, should pay for it :D  I drove to the field with my son late afternoon though the sun was hot but  it's still bearable.  Being in the field made me happy, it gave me the feeling that warmth of summer is here to stay.  The strawberries were huge and they're red on the inside too; this is how ripe strawberries should look like.

strawberry banana crepe cake-1-3


strawberry banana crepe cake-1-2


My son begged me to make strawberry pie and I also planned to make a breakfast treat for Father's Day, so even though we picked more strawberries than what we needed, they're off to good use.  Last night I made the crepe batter, stored it in the fridge afterwards, and this morning I cooked the crepe.  The crepe cake is consisted of layers of crepe with dollops of Nutella, sliced strawberries, and sliced bananas.  When I cut the cake to serve, the Nutella was oozing between the layers and they're so delicious.  Everyone agreed that this was a yummy breakfast and we all polished the whole cake in no time.  I'm dreaming of making a different combo next time...


Strawberry-Banana Crepe Cake


Serves 4


Crepe Batter:

3/4 cup all-purpose flour

1/2 cup granulated sugar

1/4 teaspoon salt

2 large egg and 1 egg yolk

1 1/4 cups whole milk

1 teaspoon vanilla extract

4 tablespoons (1/2 stick) melted butter, for the pan


Filling:

Chocolate-hazelnut spread, such as Nutella

Strawberries, sliced

Bananas, sliced


Confectioners' sugar


For crepes:  In a food processor, pulse flour, sugar, and salt until combined.  Add eggs and yolk; process until blended.  With the motor running, slowly pour in milk and vanilla; process until smooth.  Refrigerate batter for 15 minutes, or up to overnight.

Warm a 9-inch nonstick skillet over medium heat.  Add just a bit of butter to coat the pan.  Pour about 3 tablespoons of batter into hot pan; pick up pan and swirl it around to evenly spread batter.  Place back on heat; cook for 30 seconds (I like to cook until edges are starting to get brown).  Using a spatula and fingers, flip crepe; cook for 30 seconds.  Crepe should be almost firm to the touch and spotty brown.  Transfer to a cutting board.  Repeat process with remaining batter to make about 10 crepes.  (You may have extra crepes; add them to the stack.)

Preheat broiler.  Line a baking sheet with parchment paper.  Layer two crepes on prepared pan.  Spread a thin layer of Nutella onto the top crepe; add a few strawberry and banana slices.  Top with another crepe and layer more Nutella, strawberry, and banana.  Repeat this process with remaining crepes.  Top with a final crepe.  Place baking sheet under broiler until cake is warmed through.  Sprinkle cake with confectioners' sugar.


Source:  Debbie Macomber's Christmas Cookbook

Monday, June 4, 2012

Piña Colada Cake

There are days that I will definitely bake a cake, and those are birthdays and wedding anniversary.  Last week we celebrated our anniversary and my hubby's birthday's on dates that were only a day apart.  When I asked what kind of cake he wanted for his birthday, he asked for a cake with pineapple.  Pineapple in a cake sounded yummy and refreshing, and it's also in season and abundant right now.  So I went on searching on what kind of pineapple cake would be good to make, and I found it in the book by Alisa Huntsman and Peter Wynne, Sky High.  I've made cakes from the book before and I've had great result so I knew that I could rely on the recipes.

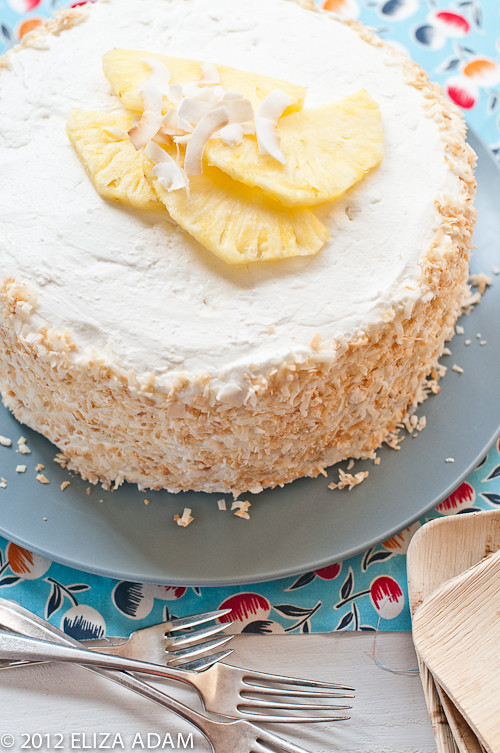
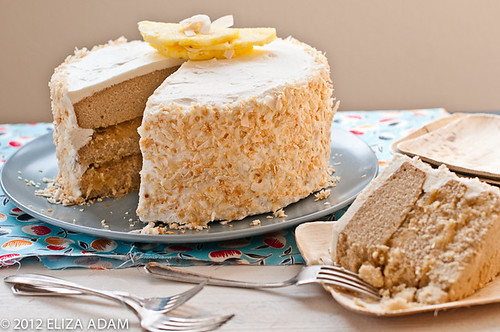
She has a piña colada cake which I thought was perfect.  Lime accented pineapple-like jam was used for the filling; the cake layers were of brown sugar that added butterscotch-like flavor, and the frosting was a smooth, airy, and not overly sweet meringue coconut buttercream.  I haven't made layered cake for a long time but surprisingly the step-by-step instructions in the recipe wasn't as complicated as I thought.  I know that I've always enjoyed the process of making a layered cake though I'm not really good at decorating it.  For cake decoration, I prefer something simple and unfussy, partly because I don't practice much and most importantly, I'd rather have the flavor to be the number one goal.

pina colada cake-1-6


pina colada cake-1-3


All in all we enjoyed the cake very much; piña colada in a cake, who could resist?


Piña Colada Cake


Makes a 9-inch triple-layer cake


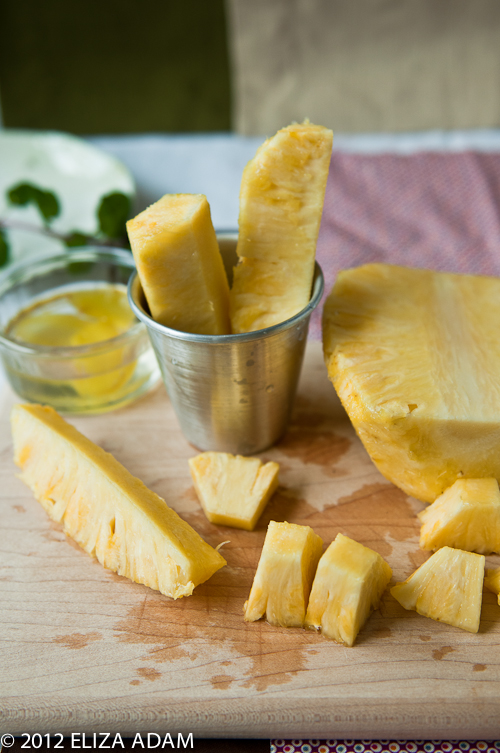
1 can (20 ounces) crushed pineapple in juice (no sugar added)

1 cup sugar

1/4 cup freshly squeezed lime juice

1 one-inch piece of vanilla bean, split in half

Brown Sugar Cake, recipe follows

Coconut Buttercream, recipe follows

2/3 cup light rum (light, amber, or dark, whichever you prefer)

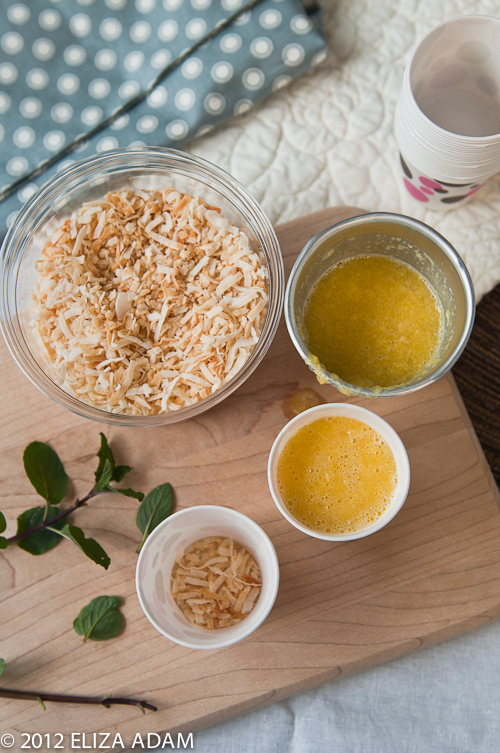
Coconut flakes and thin slice of fresh pineapple, for decoration


Combine the crushed pineapple, sugar, and lime juice in a large nonreactive skillet.  With the tip of a small knife, scrape the vanilla seeds into the pan; add the pod as well.  Warm over medium-low heat, stirring to dissolve the sugar, 2 to 3 minutes.

Raise the heat to medium and simmer, stirring occasionally to prevent scorching, until the juices have almost completely evaporated and the pineapple has a jamlike consistency.  Remove from the heat and discard the vanilla pod.  Let the pineapple filling cool completely before using.  (The filling can be made a day ahead and refrigerated.  Let return to room temperature before using.)

Bake the Brown Sugar Cake as directed.  Let the layers cool completely.  Prepare the Coconut Buttercream just before you're ready to use it.

To assemble the cake, place one layer, flat side up, on a cake stand or serving plate.  Sprinkle a generous 3 tablespoons rum over the cake. Spread half of the pineapple filling over the layer, leaving a 1/4-inch margin around the edge.  Add the second layer, sprinkle with more um, and cover with the remaining filling.  Top with the third layer, flat side up, and sprinkle with the remaining rum.  Frost the top and sides of the cake with the Coconut Buttercream.  Decorate with some coconut shreds and thin slices of pineapple.

pina colada cake-1-2

Brown Sugar Cake


Makes three 9-inch layers


3 3/4 cups cake flour

1 3/4 teaspoons baking soda

1 teaspoon baking powder

1/2 teaspoon salt

2 1/4 cups packed light brown sugar

2 sticks (8 ounces) unsalted butter, at room temperature

1 3/4 buttermilk

5 eggs

2 teaspoons vanilla extract


Preheat the oven to 350 degrees F.  Butter three 9-inch cake pans.  Line the bottom of each pan with a round of parchment or waxed paper and butter the paper.

Sift together the flour, baking soda, baking powder, and salt into a large mixer bowl; whisk gently to combine.  Add the brown sugar, butter, and 1 1/2 cups of the buttermilk to the dry ingredients.  With the mixer on low, blend to incorporate.  Raise the speed to medium and beat until light and fluffy, 2 to 3 minutes.

Whisk the eggs with the remaining 1/4 cup buttermilk and the vanilla and add to the batter in 3 additions, scraping down the sides of the bowl well and beating only long enough to incorporate between additions.  Divide the batter among the 3 prepared pans.

Bake for 25 to 28 minutes, or until a cake tester or wooden toothpick inserted in the center comes out clean.  Let the layers cool in the pans for 10 minutes; then turn out onto wire racks, carefully peel off the paper liner, and allow to cool completely before filling and frosting.


Coconut Buttercream


Makes about 5 cups


3 egg whites

1 cup sugar

1/4 cup water

2 1/2 sticks (10 ounces) unsalted butter, at room temperature

2/3 cup unsweetened coconut milk

1 1/2 teaspoons coconut extract


Put the egg white in the bowl of an electric mixer fitted with the whip attachment so they are all ready to go.

Combine the sugar and water in a small heavy saucepan and place over medium heat, stirring to dissolve the sugar.  Bring to boil and cook, without stirring, until they syrup reaches the soft-ball stage, 238 degrees F on a candy thermometer.

Beat the egg whites briefly at medium speed.  Slowly add the hot syrup in a thin stream, being careful to avoid the beaters.  Continue to whip until the meringue has cooled to body temperature.

With the mixer on low speed, gradually add the butter, several tablespoons at a time, and continue to beat until a smooth, fluffy frosting forms.

Add the coconut milk in several additions, scraping down the sides of the bowl well after each addition.  Add the coconut extract and mix until smooth.


Source:  Sky High by Alisa Huntsman and Peter Wynne