Showing posts with label breakfast. Show all posts

Friday, December 8, 2017

Whole Wheat Apple Cake


A whole wheat apple cake that's moist and choke-full of apples.  I love making easy cake like this because it's flavorful and light enough for after weekdays after dinner desserts.  We eat it for breakfast, of course, because the recipe said that it was for that time of day :)

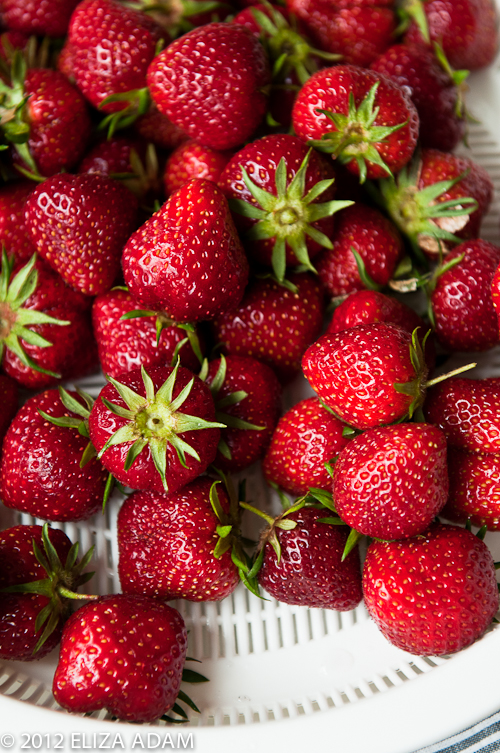
Any apples will do for this cake, I had some homegrown Fuji and Gala that I used.  It's a recipe that uses spices that are so wonderful this time of year.  The house smells so fragrant while I baked this cake.


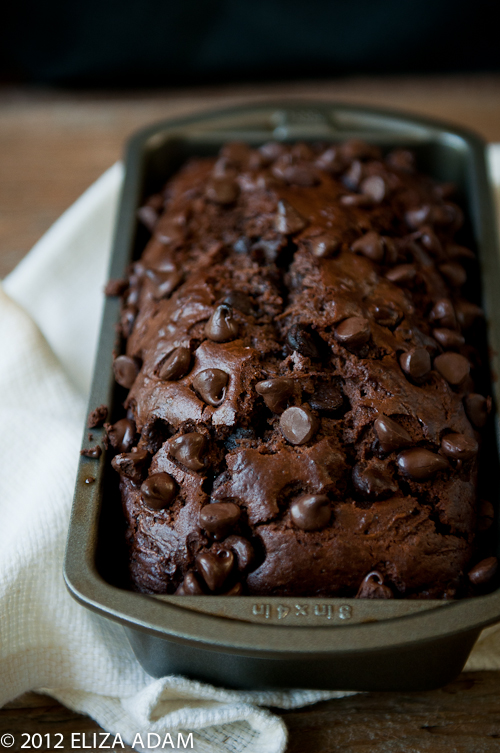
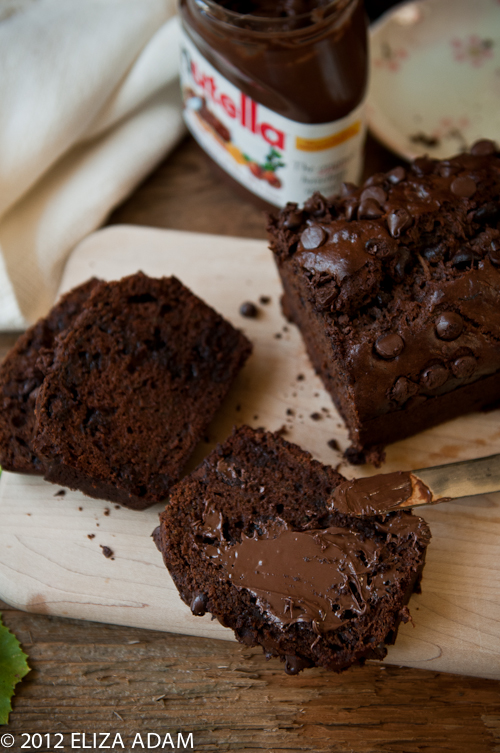
The cake is slightly darker here because I didn't cover it after 45 minutes of baking.  Oops...it's something that I missed, as usual, for not reading too carefully towards the end.  The color is pretty dark on top but the inside is still moist. 


So here is the recipe for your enjoyment!

Whole Wheat Apple Cake


Makes 1 9-inch cake


3 apples, Granny Smith, peeled, cored, and cut into 1/2-inch pieces
3/4 cup packed light brown sugar
2 teaspoons ground cinnamon
Pinch of ground cloves
1 1/4 cups all-purpose flour
1 1/4 cups whole wheat flour
1 teaspoon baking soda
1 teaspoon baking powder
1/4 teaspoon salt
10 tablespoons (1 1/4 stick) unsalted butter, room temperature, plus more for pan
1 cup granulated sugar
3 large eggs
1 teaspoon pure vanilla extract
1 1/4 cups plain whole-milk yogurt


Preheat oven to 350 degree F.  In a medium bowl, combine apples, 1/2 cup light-brown sugar, cinnamon, and cloves; set aside.  Sift together the flours, baking soda, baking powder, and salt into a medium bowl; set aside.  Butter a 9-inch springform pan.

In the bowl of an electric mixer, cream butter and granulated sugar until light and fluffy, about 4 minutes.  Add eggs, one at a time, until well combined.  Add vanilla extract, and combine.  Add reserved flour mixture and yogurt; stir until well combined.  Fold in two-thirds of the reserved apple mixture.

Spoon half of the batter into prepared pan.  Sprinkle remaining apple mixture evenly over batter.  Top with remaining batter; smooth with a spatula.  Sprinkle top with remaining 1/4 cup brown sugar.

Bake cake until golden brown and a cake tester inserted in center comes out clean, 1 hour 10 minutes to 1 hour 20 minutes.  Cover with foil after 45 minutes of baking.  Let cool 20 minutes before releasing cake from the pan.


Source:  adapted from The Martha Stewart Living Christmas Cookbook

Monday, November 20, 2017

Mini Chocolate-Cinnamon Rolls


I'm so excited with a week break I have from work.  Yes, it is a Thanksgiving break for me and what do I have in mind?  My plan is to bake and cook!  I'm trying to squeeze in as many baking activities in a week, plus some cooking for Thanksgiving day for my family.

So far, I've managed to make these mini chocolate-cinnamon rolls for breakfast.  They're bite-sized morsels that I don't think it is a sin that they are categorized as desserts.  I slather these buns very well with butter and cinnamon-sugar.  Then chocolate chips were added liberally all over.  Then I rolled them as tight as I can, not an easy feat because the dough is pretty thin, but it can be done!  When it's still warm, the melted chocolate is a delicious addition to these buns.


When they're this small, my family can eat about 5 at once for breakfast.  I'm surprised that I only ate 3 but then I ate another 2 for desserts :D

The week will get busy so I better share this today!


Mini Chocolate-Cinnamon Rolls


Makes about 40 small buns


Dough:
1 cup water
1/4 cup dry milk
3/4 teaspoon salt
2 tablespoons packed brown sugar
1 tablespoon unsalted butter, at room temperature
3 1/2 cups bread flour
3/4 teaspoon bread machine or instant yeast

Filling:
1 tablespoons ground cinnamon
3/4 cup light brown sugar, packed
Pinch of salt
6 tablespoons unsalted butter, softened; divided
1 cup semisweet chocolate chips, divided

Glaze:
2 cups confectioners' sugar
1 teaspoon vanilla extract
2 tablespoons unsalted butter, softened
Pinch of salt
2 tablespoons milk, more if needed to make a flowing consistency


I used bread machine to make my dough so place the ingredients for the dough into the bread pan in the order recommended by the manufacturer.  Select Dough Cycle.

For the filling:  combine ground cinnamon, brown sugar, and salt in a small bowl.

Once the cycle is done, remove dough to a lightly floured board; cover with a large bowl and let rest 10 to 15 minutes.

Divide the dough in half.  Roll out each half to a 20-by 7-inch rectangle.  Spread one rectangle with 3 tablespoons soft butter to within 1/2 inch of the edges.  Sprinkle half of the cinnamon sugar mixture then scatter half of the chocolate chips over the dough. 

Beginning at the long side, roll jellyroll-style.  Pinch to seal seam.  Cut into 20 1-inch pieces.  Place these, cut side up,  on a large baking sheet lined with parchment or sprayed with cooking spray.  Repeat procedure with remaining dough.  Cover and let dough rise in a warm, draft-free place for 30 to 40 minutes, or until doubled in volume.  Meanwhile, preheat oven to 375 degree F.

Bake in a preheated oven for 20-25 minutes, or until buns start to brown around the sides.  Allow to stand for a few minutes while preparing the glaze.

For the glaze:  combine all the ingredients for the glaze in a bowl and whisk until well-combined.

Drizzle the glaze onto the buns while they are still warm.


Source:  adapted from 300 Best Bread Machine Recipes by Donna Washburn and Heather Butt


Saturday, September 23, 2017

Peach-Apricot Cobbler with Crystallized Ginger


My apology for not keeping up with the blog.  I feel like it's getting a bit challenging to write a post here.  Some weeks I don't even make desserts.  The desire is there but my energy is being channeled somewhere else.  This September is particularly challenging, with a new year of school starting, there's a lot of distractions and happenings at work that when I get home and especially on weekend, I don't feel like making anything.  Hopefully next month things will start to get easier and I can go back to baking on weekends.


This cobbler is one of desserts I made a while ago.  I was fortunate to get some more fresh peaches from Peach Cove Farm in Canby that I went ahead making some canned peach sauce and the leftovers were made into this cobbler.  The fresh apricot is there because I just happened to have it and wouldn't want them to go to waste.


I ate the cobbler unadorned as breakfast, but feel free to add ice cream and make it a dessert if you like.  I love crystallized ginger, that bold flavor and the zing they impart on things, a little goes but this has quite a bit.  I guess you'll have to really like it to be able to enjoy this cobbler.


Peach Cobbler with Crystallized Ginger


Serves 8


10 yellow peaches, peeled, pitted and sliced
2 fresh apricots, pitted and sliced
1 lemon
1 1/2-inch piece fresh ginger, peeled and grated
1/3 cup granulated sugar
2 tablespoons cornstarch
Kosher salt
2 cups all-purpose flour
2 teaspoons baking powder
1/2 cup crystallized ginger, coarsely chopped
4 tablespoons cold, unsalted butter, cut into pieces
1 1/4 cups heavy cream, plus cream for brushing
1/4 cup demerara sugar
Vanilla ice cream for serving--optional

Preheat the oven to 375 degree F.

Put the peach and apricot slices in a bowl.  Finely grate 2 teaspoons zest from the lemon, then squeeze 2 tablespoons juice.  Add both to the peaches and apricots.  Add the grated ginger, granulated sugar, cornstarch, and a pinch of salt and toss gently.

In a food processor, combine the flour, the baking powder, and 1/2 teaspoon salt.  Add the crystallized ginger and pulse briefly to combine.  Add the butter and pulse until the mixture resembles coarse meal.  Transfer to a large bowl, add the 1 1/4 cups cream, and mix until the dough comes together.  Turn the dough onto a lightly floured work surface and knead 2 or 3 times to bring it together into a ball.  Shape the dough into a round about 1/2 inch thick, then cut the dough into 8 even wedges.

Transfer the peach-apricot mixture to a 9-by-13-inch baking dish and arrange the dough wedges on top in 2 rows of 4 wedges, alternating the points.  Brush the wedges with cream and sprinkle with the demerara sugar.  Bake for 25 minutes.  Loosely cover the dish with foil and continue baking until the topping is deep golden brown and the juices are bubbling, 10-20 minutes.  Let cool, uncovered, for at least 20 minutes.  Serve the cobbler with ice cream, if preferred.


Source:  adapted from Dessert of the Day by Kim Laidlaw

Friday, December 9, 2016

Gingerbread Cinnamon Buns


Another day of staying at home because of snow day.  It snowed late morning yesterday and even though there was not much accumulation, the snow has turned into a thin coat of ice this morning.  The school was canceled which meant I didn't have to go to work either.  Honestly I didn't feel like going to work :)  I have to drive uphill to my work and if the roads weren't cleared, which sometimes can happen, I'd rather stay home.

Because of that, I had quite a bit of time at home right now.  I ventured out to the back yard to take photos of icicles and then went back to do the same with my fruitcake.  Yes, I made a fruitcake yesterday afternoon.  No, it isn't a brick-heavy one; this is a lighter fruit cake from a Mary Berry's recipes.  I made this first last month and we really loved it.  It is rather cakey with lots of dried sour cherries, raisins, and fruitcake mix.  Some people are turned off by that fruitcake mix, but I don't mind it at all; my mom used to make a Dutch-style fruitcake using glace red and green cherries when I was young so I grew up eating it.


I will share the recipe later on but this time I want to share what I made for breakfast last weekend.  This is gingerbread cinnamon buns because we're a fan of cinnamon buns.  I think these buns are perfect for the season, the smell of the spices when they're baked is absolutely delicious.  I've always made cinnamon buns the night before and let them do the second proofing in the fridge.  In the morning of, I take them out and let rest for 30 minutes before baking them.  The freshly baked buns are ready in less than 30 minutes.


Gingerbread Cinnamon Buns


Makes 9 servings


1/4 cup warm water (105-115 degrees F)
2 pkg. active dry yeast
1/2 cup evaporated milk
1/3 cup molasses
1/4 cup packed brown sugar
2 tablespoons vegetable oil
1/2 teaspoon salt
3 3/4 to 4 cups all-purpose flour
1/4 cup packed brown sugar
2 tablespoons granulated sugar
1 teaspoon ground cinnamon
1/2 teaspoon ground ginger
1/4 teaspoon ground cloves
2 tablespoons unsalted butter, softened
1 recipe Spiced Glaze

In a large bowl combine the warm water and the yeast, stirring to dissolve yeast.  Let stand 5 minutes.  Stir in the next six ingredients (through salt).  Stir in as much of the flour as you can.

Turn dough out onto a lightly floured surface.  Knead in enough of the remaining flour to make a moderately soft dough that is smooth and elastic (3 to 5 minutes total).  Shape dough into a ball.  Place in a lightly greased bowl, turning once to grease surface.  Cover and let rise in a warm place until double in size (1 to 1 1/2 hours).

Punch down dough.  Turn out onto a lightly floured surface.  Cover and let stand for 10 minutes.  Lightly grease a 13x9-inch baking pan.  For filling, combine the next five ingredients (through cloves).

Roll dough into a 12x8-inch rectangle.  Spread dough with butter.  Sprinkle with filling, leaving 1 inch unfilled along one of the long sides.  Roll up rectangle, starting from the filled long side.  Pinch dough to seal seams.  Cut into 12 slices.  Arrange and let rise in a warm place until nearly double in size (about 45 minutes).  At this point, you can cover it with plastic wrap and place it in the refrigerator to proof for overnight.

Preheat oven to 350 degrees F.  Bake 22 to 25 minutes or until golden brown.  Cool in pan on a wire rack for 5 minutes.  Drizzle with Spiced Glaze.


Spiced Glaze:  Stir together 1 1/2 cups powdered sugar, 1 tablespoon milk, 1/2 teaspoon ground cinnamon, and 1/2 teaspoon vanilla extract.  Stir in additional milk, 1 teaspoon at a time, to make a glaze drizzling consistency.


Source:  adapted from Fall Baking 2015, Better Homes and Gardens

Tuesday, March 22, 2016

Chelsea Buns


I just got back from my son's science trip with his school for 8 days last week, and I'm exhausted!  Not so much physically but mentally because there's so much to think about during the trip, the safety of the kids was always the paramount.  The constant vigilance of where they were and what they're doing, and the long drives wore me out.  But it didn't mean I didn't have good time because I got the chance to visit my bestie and my alma mater.

The kids went to Catalina Island Marine Institute to study marine biology and we stopped along the way, first at San Fransisco and second at Knott's Berry Farm.  The kids bonded and the chaperones bonded as well; the women I know were really wonderful and we got to know each other more.

With that trip behind me, I can now enjoy my spring break!  So need a break from a routine even though the typical springtime weather is back, days of grey and mist.  Ah, that's Oregon...


Maybe this Chelsea buns will cheer me up?  These are tasty buns, chockfull of moist dried fruits which my husband and I love.  My son still chose cinnamon rolls over this but he still ate a handful :)


Chelsea Buns


Yields about 12 large buns or 24 small buns


For sweet bread dough:
3/4 cup (6 ounces) warm water
2 teaspoons sugar
1 tablespoon active dry yeast
1/2 cup (2 ounces) bread flour
3/4 cup (6 ounces) plain yogurt--regular or Greek, can be substituted with sour cream or buttermilk
1/2 cup (1 stick) unsalted butter, softened
2 large eggs, lightly beaten
1/2 cup sugar
2 teaspoons salt
2 teaspoons vanilla extract
4 1/2 to 5 1/2 cups bread flour
1 egg + 1 tablespoon water (for egg wash)

For the filling:
1/3 cup unsalted butter, melted
1 cup brown sugar, packed
3 tablespoon cinnamon
1 1/2 cups mixed dried fruit

For the icing:
1 cup confectioners' sugar
3 1/2 to 4 tablespoons cream or 2 to 3 tablespoons milk


In a small bowl, combine the warm water and 2 teaspoons sugar.  Stir to dissolve.  Stir in the yeast and 1/2 cup flour.  Cover with plastic wrap and set aside until bubbly and active, about 10 to 15 minutes.

In a bowl of a mixer or bucket for bread machine, combine the yogurt, butter, eggs, sugar, salt, vanilla, and yeast mixture.  Add 4 1/2 cups of flour and knead the dough--by mixer or bread machine--to make a smooth, supple, and soft dough.  Add the extra flour only if needed, 1/2 cup at a time.  If using a mixer, place the dough in a lightly oiled bowl, turn to grease all sides, cover the bowl, and let the dough rise for 60 minutes, or until doubled in bulk.  If using bread machine, let it rise in the machine until the end of the Dough cycle.

Gently deflate the dough, and transfer it to a lightly floured work surface.  Roll the dough into a 16" x 24" rectangle.

Spread the dough with the 1/3 cup melted butter.  Mix the brown sugar and cinnamon, and sprinkle it evenly over the dough.  Scatter the mixed dried fruit over the cinnamon sugar and lightly press it down onto the dough.

Starting with a long end, roll the dough into a log and cut it into 12 slices for large buns or 24 slices for small buns.  Whatever the size of buns you cut, they'll turn out delicious!

Place the buns in lightly greased baking sheets.  Cover the pan and let the buns rise until they're nearly doubled, about 45 minutes.

While the buns are rising, preheat the oven to 375F.  Brush buns with egg wash and bake until golden brown, about 30-40 minutes.  While the buns are baking, make the icing by stirring together confectioners' sugar with cream or milk.

Remove the buns from the oven.  Drizzle the icing on the buns while they are warm.


Friday, February 5, 2016

Baked Eggs with Roasted Vegetable Hash


One of the protein sources we like to eat as a family is egg.  Egg is a constant our go-to choice for breakfast, it's very versatile, easy to fix, and it fills up our tummies :)  I was trying out a new recipe and this one is super easy and very satisfying.

Grated Fontina cheese is folded into the whipped eggs and then they're baked in the cast iron skillet until puffy and golden brown.  The sweet potatoes and mushrooms are baked in the oven until tender; they don't need a lot of adornment because they're inherently flavorful.  Afterwards, they're sort of thrown together in a plate, ready to be devoured.  I really like these flavors combination together, the way the earthiness of the mushrooms, the natural sweetness of the sweet potatoes, and the nuttiness of the cheese comes together is very moreish .


Baked Eggs with Roasted Vegetable Hash


Serves 6

10 large eggs
1 cup whole milk
Salt and freshly ground black pepper
5 ounces Fontina cheese, coarsely grated (about 1 1/2 cups)
10 ounces cremini mushrooms, trimmed and sliced thinly
1 large sweet potato (8-10 ounces), peeled and chopped into 1/4-inch pieces
1 large shallot, halved lengthwise and thinly sliced crosswise
3 tablespoons olive oil


Put racks in upper and lower thirds of oven and preheat oven to 450F.  Butter an 8-inch cast iron skillet or  a shallow 2-quart baking dish.

Whisk together eggs, milk, 3/4 teaspoon salt, and 1/4 teaspoon pepper in a large bowl until smooth.  Whisk in cheese.  Pour into baking dish.

Bake in upper third oven until puffed, golden, and set, about 20 minutes.

Meanwhile, toss together mushrooms, sweet potatoes, and shallot with oil, 3/4 teaspoon salt, and 1/4 teaspoon pepper on a large baking sheet.  Spread vegetables out in an even layer and roast in lower third of oven, stirring twice after 10 minutes, until tender and golden brown, about 18 minutes.

Serve eggs with roasted vegetables spooned on top.


Source:  adapted heavily from Gourmet Today 

Tuesday, November 17, 2015

Pineapple Upside-Down Cinnamon Rolls


I've always wanted to try something different with familiar recipe, eating the same old sounds boring to me.  Well, I found it in this cinnamon rolls recipe; instead of normal cinnamon rolls, I treated my family to the pineapple upside-down cinnamon rolls.  And you know what, it's actually delicious!


The basic sweet dough recipe is already fantastic, it's a very soft dough that's easy to handle.  It can be made using a mixer or bread machine--which is my go-to machine to make bread dough.  Bread flour is my preferred flour to make sweet dough even though the original one uses all-purpose.  The quantity of pineapples was changed slightly to 2 cups instead of 1 1/2 cups.  I do like it that way so there's an equal amount of pineapple to the rolls, otherwise I would have eaten only rolls and no more pineapples.  

And because I wanted to bake it in the morning for breakfast, I proofed the two pans in my fridge overnight.  The morning of, take those pans out and set in the oven with a pan of boiling water placed on the rack underneath the pans.  Let it proof for 30 minutes and then bake.  

If you have cream cheese frosting, this is also good with it!


Pineapple Upside-Down Cinnamon Rolls


Makes 18 small rolls

Pan Sauce:
1/2 cup (1 stick) unsalted butter
2/3 cup packed light brown sugar
2 cups canned pineapple chunks (juice reserved)
1/4 cup reserved pineapple juice
1/8 teaspoon salt
9 maraschino cherries, cut in half

Dough:
Flour for dusting
1 recipe Cinnamon Roll Dough--recipe follows

Cinnamon Filling:
2 tablespoons cinnamon
1/2 cup granulated sugar
4 tablespoons unsalted butter, melted

For the pan sauce, melt the butter in a medium saucepan over medium-high heat.  Stir in the brown sugar until it melts.  Stir in the pineapple chunks and juice and cook until the sauce starts to bubble and thicken, about 3 minutes.  Stir in the salt, remove from heat, and divide the sauce between two 9-inch square pans.  Set aside to cool for 15 minutes.  Arrange half the cherries, cut side up, in the bottom of each prepared pan.

Transfer the dough to a floured surface and cut in half.  Roll each half out to an 8 by 12-inch rectangle.

For the filling, combine the cinnamon and sugar in a bowl.  Set aside.  Spread each half rectangle of dough with half the melted butter and sprinkle with half the cinnamon sugar.  Roll up the dough, starting with a short end, to form a tight 9-inch cylinder.  Cut each cylinder into 9 slice. Place each slice, spiral side up, in a prepared pan.  Cover with tea towels and let rise in a warm place until almost doubled, 45 to 60 minutes.

Preheat the oven to 375F.  Bake for 23 to 25 minutes or until the rolls have risen and browned. Transfer to a rack to cool for 5 minutes before inverting onto serving platters.

Cinnamon Roll Dough


Makes 6 jumbo, 12 large, 16 to 20 medium, or 48 mini rolls

1 cup whole milk
4 tablespoons unsalted butter, softened
1/3 cup granulated sugar
1 teaspoon salt
2 large eggs, at room temperature 
3 1/3 cups bread flour, plus more for kneading and dusting
2 1/2 teaspoons instant or bread machine yeast

In a 4-cup measuring cup, combine the milk, butter, sugar, and salt.  Microwave on High for 1 minute or until warm.  Whisk in the eggs.

Place the flour and yeast in the bowl of a stand mixer fitted with the paddle attachment.  Add the liquid ingredients.  Mix on low speed, stopping to scrape down the sides of the bowl from time to time, until the dough forms a soft mass and starts to pull away from the sides of the bowl, 5 to 6 minutes.

Remove the paddle attachment and switch to the dough hook.  With the mixer on low, knead the dough with the dough hook.  Sprinkle the dough with a tablespoon of flour, if necessary, to keep it from sticking to the sides of the bowl.  When the dough is smooth, not sticky, and springs back when you press it with your finger, you've kneaded enough (4 to 6 minutes).  Place the dough in a large, oiled mixing bowl, cover with a tea towel, and let rise in a warm place for 45 to 60 minutes, or until it has almost doubled.

For bread machine dough:  Place the liquid ingredients in the pan of the bread machine after first step.  Add the flour, then the yeast.  Select Dough cycle, and press Start.


Source:  adapted heavily from I Love Cinnamon Rolls by Judith Fertig

Sunday, September 13, 2015

Oat Crisps with Fresh Fruits and Honey Yogurt


When I made these crips I was expecting it to be good on their own.  Well, yeah, I wasn't wrong.  I ended up eating them as snacks because they were so addictive.  Crispy, crunchy, and caramel-y, I just love these!

If you want to eat these for breakfast, the simple way to do is to grab yogurt--honey flavored is my favorite--and fresh fruits for a feel good sustenance in the morning.  This recipe is simple and irresistible which what I like from the book by Emily Luchetti, Classic Star Desserts.  I've been going through my baking book collection and trying out recipes this summer when I had a more leisurely time for baking and cooking.  So far I've found very good recipes and I'm very pleased.  I hope I can continue the baking well into the busy school and work year.  Fingers crossed!


Oat Crisps with Fresh Fruits and Honey Yogurt


Serves 6


1 1/4 ounces (2 1/2 tablespoons) unsalted butter, melted
1/4 cup firmly packed dark brown sugar
2 tablespoons granulated sugar
2 tablespoons dark corn syrup
1 cup old-fashioned rolled oats
1 pint blueberries
4 medium peaches, sliced rather thinly
1 cup yogurt--any flavor you like

Preheat the oven to 350F.  Line 2 baking sheets with parchment paper.

In a bowl, combine the butter, brown sugar, granulated sugar, and corn syrup and stir until blended.  Stir in the oats, mixing well.

To form the crisps, drop the oats mixture, one tablespoon per cookie, onto the prepared baking sheets, spacing them about 2 1/2 inches apart.  Bake, rotating the baking sheets 180 degrees at the midway point, until golden brown and bubbly, about 15 minutes.  Let cool for 5 minutes on the baking sheets.  Then, using a metal spatula, transfer the crisps to a large flat plate to cool.

To serve, divide blueberries, peach slices and yogurt among individual plate and place 2 oat crisps alongside or on top of each serving.


Source:  adapted from Classic Stars Desserts by Emily Luchetti

Sunday, March 8, 2015

Pecan Sour Cream Muffins


Today's weather is just glorious.  Spring comes a little early to Oregon because it's been warm and dry lately.  I don't complain much, rain or sun is fine with me, but it's actually nice to not to put on layer upon layer of clothing.  Although the rain will come towards the end of the week, I'm planning to enjoy this warmth as much as I can.

For my weekend baking--this has become my thing, bake only on the weekends--I made pecan sour cream muffins.  The recipe comes from Maida Heatter's book, Cake.  I borrowed it from the library and has started to read it back and forth, and I decided to try this for breakfast today.  There's a lot recipes to try from the book and hopefully I can make as many as I can and blog it.  Sometimes weekend baking is just too short of a time for me, but it's the only time I have during the week to bake.  My family loves it when I bake though, they always have snacks for lunch boxes and after dinner treats.


This muffin batch is easy to make and make wonderful moist and rich muffins.  Yes, they look a little plain but they taste pretty special to me!


Pecan Sour Cream Muffins


Yields 12 large muffins

1 1/3 cups sifted unbleached all-purpose flour
1 teaspoon baking powder
1/2 teaspoon baking soda
1/8 teaspoon salt
Generous pinch of nutmeg, preferably freshly grated
2 ounces (1/2 stick) unsalted butter, softened
2/3 cup granulated sugar
2 eggs
3/4 cup sour cream
5 1/2 ounces (1 1/3 cups) toasted pecans broken into large pieces, plus 12 large toasted pecan halves


Adjust an oven rack to the middle of the oven and preheat oven to 400F.  Either butter 12 2 3/4-inch muffin tin or line them with cupcake liners.

Sift together the flour, baking powder, baking soda, salt, and nutmeg, and set aside.

In the small bowl of an electric mixer, beat the butter until soft.  Beat in the sugar to mix, then add the eggs one at a time, beating until incorporated after each addition.  On low speed, add half of the sifted dry ingredients, then all of the sour cream, and then the remaining sifted dry ingredients.  Beat only until smoothly incorporated.  Remove the bowl from the mixer and stir in the 5 1/2 ounces of pecan pieces.

Spoon into the prepared muffin tins.  It is not necessary to smooth the tops; the muffins will do it themselves during baking.  Place a pecan half, flat side down, on each muffin; press them only slightly into the muffins.

Bake for 15 to 20 minutes, until the muffins spring back when pressed lightly with a fingertip.  During baking the muffins will rise with high, nicely rounded, golden-brown tops.

Remove from the pans immediately and place on a rack.  These may be served warm or cooled.


Source:  adapted from Maida Heatter's Cakes

Thursday, October 9, 2014

Apple Strata


A breakfast dish that I like to make is strata.  It is a good way to use up day-old bread with some things from the pantry or fridge and perhaps produce.  Everything is assembled the night before and baking it in the morning would take about an hour before it is ready to be consumed.  I don't know why, but I like custardy dish for breakfast; it gives me warm and fuzzy feeling.  And especially with a cooler weather forecast for the rest of the week, one needs to make this quite often.


Apple Strata


Serves 4 to 6

6 slices day-old sourdough bread, cubed, divided
4 ounces cream cheese, cubed
1 apple, peeled and chopped
½ cup raisins 
6 large eggs
1 ¼ cups whole milk
1 tablespoon sugar
1 teaspoon ground cinnamon
¼ teaspoon ground cloves
Dash of ground nutmeg
Confectioners' sugar or maple syrup for topping

Place half the bread cubes in a lightly sprayed or oiled 8-by-11 ½-inch baking dish.  Distribute cream cheese cubes over bread cubes.  Top with apples and raisins, and cover with remaining bread cubes.

In a medium bowl, whisk together eggs, milk, brown sugar, cinnamon, cloves, and nutmeg.  Pour over bread mixture in dish.  Be sure bread is completely covered.  Cover and refrigerate for several hours or overnight.

Preheat oven to 375F.  Bring strata to room temperature before baking.  Bake, uncovered, until set, 50 to 55 minutes.  Let stand for 10 minutes.  Sprinkle with confectioners' sugar, or pass maple syrup at the table.  Cut into squares and serve.


Source:  The Big Book of Breakfast by Maryana Vollstedt


Sunday, August 24, 2014

Baked French Toast with Nutella


Every Sunday I try to make special breakfast for my family because Sunday morning tends to be the most relaxed morning of all mornings.  Usually there's nothing going on that we have to wake up so early, making it the perfect day to have a more elaborate breakfast dish.  Our favorites are pancakes (blueberry, banana, chocolate chip flavors are on the top list), waffles, cinnamon rolls, sticky buns, crepes, omelet, well, the list can go on.  I actually enjoy making these type of breakfast items, it seems to set the day in a good mood.  

Even though my son likes most of my breakfast dishes, he is still reluctant to eat French toast.  His reasoning is that it's weird to eat bread with syrup.  Syrup is for pancakes and waffles according to his taste.  But he likes this baked French toast (yay!).  Powdered sugar is a good enough topping for him.  I didn't use store bought white bread because I happen to have made homemade bread earlier in the week.  My bread is usually quite sturdy and didn't fall apart when the filling was spread.   It's not a fancy breakfast and I just have to serve this alongside a cold glass of chocolate milk and everyone is happy with a full tummy.

A variation of this French toast is to use jam instead of Nutella with the cream cheese.  I haven't tried it yet, but will do since Sunday is coming soon! :)


Baked French Toast with Nutella 


Makes 4 to 8 servings

Toast:
4 ounces cream cheese, at room temperature
6 tablespoons Nutella, at room temperature
8 slices white bread

Custard:
4 eggs
1 cup milk
2 tablespoons granulated sugar
1 teaspoon vanilla extract
¼ teaspoon ground nutmeg

Powdered sugar
Maple syrup

To make sandwich:  Mix cream cheese and Nutella until combined.  Spoon mixture on 4 bread slices and spread all the way to outside edges, then top with remaining slices to make sandwiches.  Place in resealable plastic bag and refrigerate until ready to bake.

To make custard:  In flat container with an airtight lid large enough to hold a bread slice, beat together eggs, milk, sugar, vanilla, and nutmeg.  Cover and refrigerate until ready to use.

To assemble:  Preheat oven to 350F.  Mist a 9-by-13-inch baking pan with sides with nonstick cooking spray.  Dip sandwiches into custard, turning once, for 2 minutes on first side and 1 on the second to soak up as much of the custard as possible.  Lay drained slices on pan and bake for 15 minutes, then turn them over and bake for 20 minutes more, or until toast is golden brown on both sides.  Sprinkle lightly with sifted powdered sugar and serve with syrup.  Recipe can easily be doubled.


Source:  FoodDay The Oregonian

Sunday, July 13, 2014

Lemon-Blueberry Muffins


When life gives you blueberries, you'll make blueberry muffins, won't you?  I've abundant blueberries right now and since last week I've made blueberry pancakes to use them up.  The two blueberry plants in the backyard won't stop producing even some fruits fell to the ground.  One produces slightly sour and smaller fruits whereas the second one yields sweeter and bigger fruits.  I've never had to pick or buy blueberries for many years to come!

One of my favorite things to make with blueberries is muffins.  I like soft, fluffy and slightly sweet muffins to be the backdrop of juicy, sweet, some tart blueberry fruits.  These are good for breakfast, but don't let it stop you from eating it for snack as well.  

I like this recipe from America's Test Kitchen baking book, it's a great base muffin recipe that can be used for a variety of fruits or nuts fillings and it always makes good size muffins with soft texture.  I had last bit of Nancy's honey yogurt in my fridge (Nancy's a local yogurt company, based in Eugene, OR) and that's what I used to make these babies.  Often time I don't have yogurt but sour cream, and I think that works out well too.  Because of the soft texture of the muffins, I leave them longer in the pan after they're done baking.  That way, it'll hold its shape well when it's taken out.  

I also sprinkled some cinnamon-sugar mixture on top of the muffins to give them extra flavor.  Any little touch will make these muffins extra special :)


Lemon-Blueberry Muffins


Makes 12

3 cups all-purpose flour
1 cup sugar
1 tablespoon baking powder
½ teaspoon baking soda
½ teaspoon salt
1 ½ cups whole plain yogurt
2 large eggs
1 teaspoon grated fresh lemon zest
8 tablespoons (1 stick) unsalted butter, melted and cooled
1 ½ cups fresh blueberries
1 tablespoon all-purpose flour

Cinnamon-sugar mixture, optional


Place a rack in the middle position and preheat the oven to 375F.  Grease a 12-cup muffin pan.  Toss blueberries with 1 tablespoon all-purpose flour.

Whisk the flour, sugar, baking powder, baking soda, and salt together in a large bowl.  In a medium bowl, whisk the yogurt, eggs, lemon zest, and melted butter until smooth.  Gently fold the yogurt mixture into the flour mixture with a rubber spatula until just combined, then fold in the blueberries.

Using a greased ice cream scooper, portion the batter into each muffin cup.  Scatter some cinnamon-sugar mixture if desired.  Bake until golden brown and a toothpick inserted into the center of a muffin comes out with just a few crumbs attached, 25 to 30 minutes, rotating the pan halfway through baking.

Let the muffins cool in the pan for 10 minutes, then flip out onto a wire rack, and let cool for 10 minutes before serving.

Source:  The America's Test Kitchen Family Baking Book


Saturday, May 17, 2014

Cocomama Quinoa Cereal


Quinoa is still in one of the food trends for 2014, and I'm glad that it won't go away so soon.  Why?  Because I just had an opportunity to sample ready-to-eat quinoa cereal from Cocomama.  I've cooked with quinoa before and I almost always incorporate it into my homemade bread.  It's quite versatile, easy to digest protein-packed grain with slightly crunchy texture.  My bread comes out with fluffy and soft texture which everyone likes and it stays like that for days.

There are several flavors to choose from, Banana Cinnamon, Honey Almond, Orange Cranberry, and Wild Blueberry, and all are equally good. My favorite is Honey Almond flavor, while my son's favorite is the Banana Cinnamon.  What I like about this cereal is that it's precooked, you can eat it either cold or warm--very convenient, and the quantity is just right for breakfast meal.  The crunchy texture is what makes quinoa cereal fun to eat for my son, his only complain is that the banana needs to shine more in the Banana Cinnamon flavor.  I don't have any quips with Honey Almond flavor though; there's coconut cream in the product which I detect but it's not bothersome, in fact I like it.  I think this cereal is much better than those instant flavored oatmeals, this is barely sweet not too mention healthier because of all the natural flavors it uses.


Cocomama also has another product which is called Crunched Out.  This comes in clusters--like pieces of breakfast bars--intended to eat as snacks, in yogurt, milk, or for ice cream topping (delicious!).  I haven't tried this before but I think I will!

Here's the video about their Kickstarter campaign--with link for you to click--and help spread out the revolution of quinoa cereal!


Disclaimer:  I was sent samples of Cocomama Quinoa Cereal.  All opinions are solely my own.

Friday, August 30, 2013

Apple-Cinnamon Pull-Apart Bread


Is it time for apples yet?  You bet!  Even if I'm ready to face fall season I'm confronted to the fact that my son will start school soon and I'm back working as well.  Fall means cooler weather with more rain and the feeling of wanting for comfort food.  Apples fit perfectly because in the season because there will be apple cider, apple pies, crumbles, and many more.  What's more perfect is the aroma of apple and cinnamon, that just spells fall to me.


This pull-apart bread is very easy to make and will guarantee to make your kitchen smells good.  I've a friend whose apple trees bear enough fruits for me to pick some to be used in this bread.  Since this bake in no time, I'm planning to make it often for afternoon snack for my son when he gets home from school.  Try it, you'll probably welcome fall more than you like to :)


Apple-Cinnamon Pull-Apart Bread


Makes 6 servings


Nonstick cooking spray

1 7.5-ounce package (10) refrigerated reduced-fat home-style biscuits

4 teaspoons ground flaxseeds--I didn't have it so I substituted with wheat germ

2 teaspoons granulated sugar, divided

1/2 teaspoon ground cinnamon

1/2 cup thinly sliced apple--I used 1 medium apple and used up all the apple slices to fill the bread

3 tablespoons coarsely chopped walnuts--mine is chopped slightly fine

2 tablespoons packed brown sugar

2 tablespoons orange juice

1 tablespoon unsalted butter

2 tablespoons reduced-fat cream cheese (Neufchatel), softened

2 teaspoons orange juice

1/2 teaspoon vanilla extract


Preheat oven to 350 degree F.  Coat an 8x4x2-inch loaf pan with cooking spray; set aside.  Cut biscuits in half crosswise.  In a small bowl stir together ground flaxseeds, 1 teaspoon of the granulated sugar, and the cinnamon.  Roll biscuit halves in flaxseed mixture to coat.  Alternately arrange biscuit halves and apple slices in the prepared loaf pan.  Sprinkle with any remaining flaxseed mixture and the walnuts.

In a small saucepan combine brown sugar, the 2 tablespoons orange juice, and the butter.  Cook and stir over medium-high heat until boiling.  Pour mixture over biscuits.  Bake about 25 minutes or until edges are golden and biscuits near center are done.  Cool in pan on a wire rack for 5 minutes.  Invert bread onto a small baking sheet; invert again onto a serving platter.

For icing, in a small bowl whisk together cream cheese, the 2 teaspoons orange juice, the vanilla, and the remaining 1 teaspoon granulated sugar.  Drizzle bread with icing.  Serve warm.


Source:  adapted from Better and Home Gardens Fall Baking 2013

Tuesday, January 1, 2013

Smoked Salmon Hash


Hello and Happy New Year!

It was a beautiful morning when I woke up today.  The sun shone bright and not a cloud could be found in the sky, but the air was cold and crisp.  Last night we spent at home watching the ball drop at New York's Times Square.  Sounded boring, huh?  We're usually not too keen of going anywhere on New Year's Eve, it's mostly spent being together as a family.  I had an interesting book to read last night though, and didn't go to sleep until quite late so my morning started late.

Well, late or not, I got busy right away after woken up because I wanted to cook salmon hash for our breakfast/brunch.  The recipe is pretty simple though it required boiling the potatoes half-done the day before.  I could've cooked them from raw state on the pan with a little broth I supposed.  My husband received a box of smoked salmon at Christmas and we couldn't wait to eat it right away.  I'm beginning to like smoked salmon in hash and it didn't hurt that I already like hash dish to begin with.  The dish was terrific, especially those capers that offered a bite of briny and salty punch.

A big plate of hash with a sunny-side up egg is just right.


So here's the recipe.  I'm gonna need a nap in the afternoon :)


Smoked Salmon Hash


Serves 4


2 pounds Yukon Gold potatoes (about 7 medium sized-ones)

2 tablespoons unsalted butter

2 tablespoons vegetable oil

1 small red onion, chopped

1 pound hot-smoked salmon

1 tablespoon prepared horseradish

1 tablespoon coarse-grain mustard

1/4 cup capers, drained

1/4 cup sour cream; plus more for garnish

Salt and freshly ground pepper to taste

2 tablespoons finely chopped scallions or chives


Place potatoes in a large pot and cover with cold water.  Bring to boil and cook until just barely tender, about 10 minutes (do not overcook).  Drain, cool completely.  When cool enough to handle, peel and cut the potatoes to 1/2-inch cubes.  This can be done a day ahead and refrigerate.

Shred the smoked salmon to 1-inch pieces over a medium bowl.  Add horseradish, mustard, capers, and 1/4 cup sour cream to the bowl.  Mix gently and add salt and pepper to taste; set aside.

In a large nonstick skillet, heat butter and oil over medium-high heat.  Add cubed potatoes in a single layer to the skillet, sprinkle some salt and pepper, and cook from about 5 minutes; turn occasionally.  When the potatoes begins to get brown, add chopped red onions, cook until onions is soft and potatoes are golden brown and crisp; another 3-4 minutes.

Add salmon mixture and gently fold to potatoes and onions.  Cook just until the salmon is heated through.  Add additional salt and pepper if needed.  Before serving, sprinkle chopped scallions or chives on top of potatoes and serve with additional sour cream.


Source:  adapted from Heathman Hotel & Restaurant


Saturday, September 29, 2012

Lavender Scones


I read the other day about the summer days being over; what that meant was we'd say goodbye to barbecues, picnics, beach outings, tank tops, long vacation, and lazy days.  The list is certainly long, isn't it?  But I get it  and I'm certainly sad about leaving summer as well.  Yet a few days ago when someone gave me a couple of gingersnap cookies, I was left with a wanting of the fall to be here.  I suddenly crave for the flavors of fall: ginger, cinnamon, apples, pears, and pumpkin.  And the beautiful colors of turning leaves.

This post isn't about fall flavors yet, this is about lavender scones that I made to complete a leftover lemon curd.  The scones were soft and tender, and they were required to be consumed warm, out of the oven.  There is a pot of a lavender plant just outside of my kitchen where they are still blooming right now.  Whenever I brush the flowers with a water hose, they exude this fragrant smell.  Faint but just right.  It's the same with the scones; the lavender smell is faint in them but if I get a bite of the dried speck, there's no question it is there.  The lemon curd was a leftover from a batch I made for Zupan's fall/winter edition of Indulge magazine.  It tasted eggy, soft, and zingy from the lemon, but unfortunately I wouldn't be able to post the recipe here yet.  I will update the post when the magazine comes out later.

Lavender lemon scones

Lavender Scones


Makes 16

3 cups all-purpose flour plus more for surface
3/4 cup granulated sugar
1 tablespoon baking powder
1 teaspoon dried lavender buds
1 teaspoon kosher salt
1/2 teaspoon baking soda
3/4 cup (1 1/2 sticks) chilled unsalted butter, cut into 1/4-inch cubes
1 cup plus 2 tablespoons buttermilk
2 teaspoons finely grated lemon zest
1 teaspoon vanilla extract
2 tablespoons sanding or granulated sugar
1 1/2 cups store-bought or homemade lemon curd

Arrange racks in upper and lower thirds of oven; preheat to 425°. Line 2 baking sheets with parchment paper. Whisk 3 cups flour and next 5 ingredients in a large bowl. Add butter; rub in with your fingers until mixture resembles coarse meal.
Whisk 1 cup buttermilk, zest, and vanilla in a small bowl. Add wet ingredients to dry ingredients. Stir until shaggy dough forms.
Transfer to a lightly floured surface; knead until dough forms, about 5 turns. Pat into a 10x6" rectangle. Halve dough lengthwise. Cut each half crosswise into 4 squares. Cut each square diagonally in half into 2 triangles. Divide between baking sheets. Brush with 2 Tbsp. buttermilk. Sprinkle with sanding sugar.
Bake until scones are golden and a tester inserted into the center comes out clean, 13–15 minutes. Transfer to wire racks; let cool. Serve warm or at room temperature with lemon curd.

Source: Bon Appétit, May 2012

Thursday, July 26, 2012

Double Chocolate Zucchini Bread


I found these zucchini in my parents' garden Monday afternoon.  Two plants grew healthy this summer in the sunny patch and they're starting to produce yields big enough to enjoy.  My mom couldn't contain her excitement when she saw these babies in her garden, she could hardly wait to pick more of them.

Zucchini


The day I picked those zucchini, I saw a post from King Arthur Flour's Facebook page about the double chocolate zucchini bread.  I was salivating looking at the picture that I determined I would make that the next day.  Even I couldn't contain my excitement about making a zucchini bread!

There're a lot of recipes using zucchini and chocolate but I have to say that this one is one of the best.  The amount of zucchini needed isn't outrageous (I hate grating zucchini), the chocolate flavor is really there, the bread isn't overly dry or wet, the crumb was tight, and the level of moistness is just right.  What I did differently were using half bittersweet chocolate and semisweet chocolate in the bread and save 1/4 cup to sprinkle on top of the bread; otherwise everything stayed the same.  Baking time was slightly reduced for my oven, it was around 60 minutes that the bread was done.  And I smeared some Nutella on my bread, mmm....

Chocolate Zucchini Bread


Chocolate Zucchini Bread


A bread like this makes me smile; it makes me think of a wonderful summer weather, the harvest from our own garden, and how connected we are to the food we grow ourselves.


Double Chocolate Zucchini Bread


Yield one 8 1/2" x 4 1/2" loaf


2 large eggs

1/3 cup honey

1/2 cup vegetable oil

1/2 cup brown sugar

1 teaspoon vanilla extract

1 teaspoon salt

1/2 teaspoon baking soda

1/2 teaspoon baking powder

1/2 teaspoon espresso powder, optional

1/3 cup cocoa powder or Dutch-process cocoa

1 2/3 cups all-purpose flour

2 cups shredded, unpeeled zucchini, gently pressed on a colander over a bowl or sink to release some of its moisture

1 1/4 cups chocolate chips (a combination of bittersweet and semisweet), save the 1/4 cup for sprinkling on top of bread


Preheat the oven to 350°F; lightly grease an 8 1/2" x 4 1/2" loaf pan.

In a large mixing bowl, beat the eggs, honey, oil, sugar, and vanilla until smooth. Add the salt, baking soda, baking powder, espresso powder, cocoa, and flour, mixing until well combined. Stir in the zucchini and chocolate chips. Pour the batter into the prepared pan.  Scatter the reserved 1/4 cup of chocolate chips on top of the batter.

Bake the bread for 65 to 75 minutes, until the loaf tests done (a toothpick or cake tester inserted into the center will come out clean, save for perhaps a light smear of chocolate from the melted chips).

Remove the bread from the oven, and let it cool for 10 to 15 minutes before turning it out of the pan onto a rack.  Cool completely before slicing; store well-wrapped, at room temperature.

Sunday, June 17, 2012

Strawberry-Banana Crepe Cake

Strawberry season is officially here!

From my parents' garden, we harvested small but big in taste strawberries.  The plants are still producing quite a big yield every summer, enough for a week's consumption.  Every day my mom would be in the backyard harvesting the berries.  I have a box of strawberry plants as well in my backyard but due to lack of sun, they never really produce enough berries for us.  I'm thinking of replacing those with something else in the future.  But my herbs thrive in the box garden well enough that I'm happy to have fresh herb every spring to use in my kitchen.

Yesterday I decided to pick strawberries at Lee Farms in Tualatin.  My plan was to make strawberry jam and to freeze the rest that we can't eat anymore.  Last year I made some jams that I ended up giving to friends and family that I didn't have enough for myself.  This year I want all for myself and those who want it, should pay for it :D  I drove to the field with my son late afternoon though the sun was hot but  it's still bearable.  Being in the field made me happy, it gave me the feeling that warmth of summer is here to stay.  The strawberries were huge and they're red on the inside too; this is how ripe strawberries should look like.

strawberry banana crepe cake-1-3


strawberry banana crepe cake-1-2


My son begged me to make strawberry pie and I also planned to make a breakfast treat for Father's Day, so even though we picked more strawberries than what we needed, they're off to good use.  Last night I made the crepe batter, stored it in the fridge afterwards, and this morning I cooked the crepe.  The crepe cake is consisted of layers of crepe with dollops of Nutella, sliced strawberries, and sliced bananas.  When I cut the cake to serve, the Nutella was oozing between the layers and they're so delicious.  Everyone agreed that this was a yummy breakfast and we all polished the whole cake in no time.  I'm dreaming of making a different combo next time...


Strawberry-Banana Crepe Cake


Serves 4


Crepe Batter:

3/4 cup all-purpose flour

1/2 cup granulated sugar

1/4 teaspoon salt

2 large egg and 1 egg yolk

1 1/4 cups whole milk

1 teaspoon vanilla extract

4 tablespoons (1/2 stick) melted butter, for the pan


Filling:

Chocolate-hazelnut spread, such as Nutella

Strawberries, sliced

Bananas, sliced


Confectioners' sugar


For crepes:  In a food processor, pulse flour, sugar, and salt until combined.  Add eggs and yolk; process until blended.  With the motor running, slowly pour in milk and vanilla; process until smooth.  Refrigerate batter for 15 minutes, or up to overnight.

Warm a 9-inch nonstick skillet over medium heat.  Add just a bit of butter to coat the pan.  Pour about 3 tablespoons of batter into hot pan; pick up pan and swirl it around to evenly spread batter.  Place back on heat; cook for 30 seconds (I like to cook until edges are starting to get brown).  Using a spatula and fingers, flip crepe; cook for 30 seconds.  Crepe should be almost firm to the touch and spotty brown.  Transfer to a cutting board.  Repeat process with remaining batter to make about 10 crepes.  (You may have extra crepes; add them to the stack.)

Preheat broiler.  Line a baking sheet with parchment paper.  Layer two crepes on prepared pan.  Spread a thin layer of Nutella onto the top crepe; add a few strawberry and banana slices.  Top with another crepe and layer more Nutella, strawberry, and banana.  Repeat this process with remaining crepes.  Top with a final crepe.  Place baking sheet under broiler until cake is warmed through.  Sprinkle cake with confectioners' sugar.


Source:  Debbie Macomber's Christmas Cookbook

Monday, October 31, 2011

Cornmeal Pancakes


Hello again blog; hello falling leaves.  The last time I spent time writing seemed ages ago; I had my moment of not taking notes.  Frankly, I felt liberated to not have to write posts for the sake of audience.  I can come and go as I please, nobody seems to notice.  Lots of things have happened while I wasn't taking notes, life continues to be a series of some trepidation, decision-making, rushing forward to meet deadlines, appointments to make, never-ending work and chores, but only for a brief moment, a rejoicing week when my son turned a decade old.  I didn't mean to sound so tired but I'm merely waiting until everything passes away.


Breaking familiarity with something new is what I like in life; whereas my husband told me once he is comforted with anything that's familiar.  In food terms, his choice is boring, my choice is more exciting.  The same principle applies to pancakes, regular pancakes are plain and fluffy; cornmeal pancakes on the other hand are texture-wise interesting in each bite and the aroma is like the end of fall season rushes in.  My son who loves cornbread, adores these lacy-surfaced pancakes, stacked tall with butter and maple syrup.  I picked up the recipe from a book by Bill Neal, the godfather of Southern cooking.  His book is called Biscuits, Spoonbread & Sweet Potato Pie; an interesting book to read because of the wealth of information he put it in.  It was a chilly morning when I had these so I paired mine with spiced ginger-pear butter that I made earlier; there' no mistaken that I was craving foods that are in season right now.  There's much more to try in the book, none of it is too familiar to me, and that what makes life interesting--and keeps me going.

Cornmeal Pancakes


Makes about 18 pancakes

1 cup cornmeal

1/2 cup all-purpose flour

1/2 teaspoon salt

2 tablespoons sugar

2 teaspoon baking powder

1/2 teaspoon baking soda

2 large eggs

1 1/4 cups buttermilk

2 tablespoons unsalted butter, melted

Sift the dry ingredients together.  Beat the eggs, add the buttermilk and melted butter.  Add to the meal and beat to make a smooth batter.  Let stand 10 minutes, then drop by the large tablespoon onto a lightly greased, medium-hot griddle.  Cook until brown on each side, turning once, and serve with butter, jam, fruit sauce, honey, or maple syrup.

Adapted from Biscuits, Spoonbread & Sweet Potato Pie by Bill Neal