Friday, September 30, 2016

Sweet Sandwich Bread


I know I really, really love bread when I would forego social gathering in order to tend my bread making session.  This happened when I made this sweet bread a few weeks ago.  I was looking forward to be home and tending my dough when my son got invited to a friend's baptism.  All I kept thinking was how I couldn't leave my overnight sponge go a little longer while my mouth was saying, I'll chat with you soon, to friends.  I had to drop my son off and raced back home to do the bread.  It was a lot of steps, making this bread that was.  Then I had to back out again to pick him up before the bread was ready to be baked.  All I had to say to my friends was, so nice to see you again, thank you for having him(my son) here; and hugged each of them.  Then I rushed back home again.  So much for wanting to chat...

I even missed the baptism part.  I hope my friends forgive me and will invite me again to a social gathering :)


Well, the bread was worth the hectic afternoon I had.  This was a soft, Asian bakery style bread which is beloved by Asians (apparently).  My mom would love this kind, she wouldn't love Dave's Killer Bread no matter how many beneficial seeds it has :D  For me, this bread is best for eating fresh and as toasts.  The recipe yields 2 loaves; one I freeze and ate a week later.  Still good, soft, and wonderful when toasted and ate with soup.

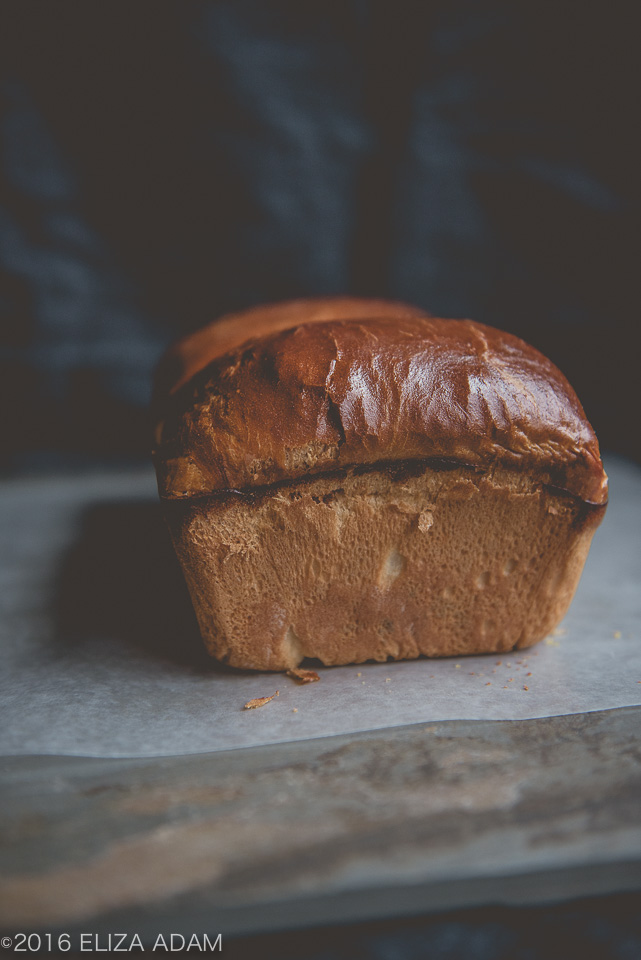
This photo below showed the loaf that was baked in a Pullman pan with the lid on.  I wasn't happy with my Pullman pan which I bought in Indonesia.  I'm thinking I need to invest in a better pan.


I made the dough using a bread maker even though the recipe showed manual method.  I think either way is fine, I like the convenient of bread maker making my dough.  If making with bread maker, you should put all the ingredients at once, choose Dough setting, and let the machine do the work.

Here's the recipe:

Sweet Sandwich Bread


Makes 2 large loaves


Overnight sponge:
1/4 teaspoon instant yeast---I used SAF Instant
60 g water
100 g bread flour

In a small bowl stir together the yeast with 20 g water.  Add the rest of the ingredients and knead to form a dough.  Let it proof for 30 minutes.  Wrap the bowl with plastic wrap and refrigerate overnight or for up to 48 hours.


Bread Dough:
550 g bread flour
80 g sugar
6 g salt
20 g powdered milk
10 g instant yeast
1 cold egg
270 g cold water
75 g unsalted butter, at room temperature

Egg wash, optional

In a bowl of a mixer place bread flour, sugar, salt, powdered milk, and yeast.  Stir with paddle attachment until combined.  Add the overnight sponge, egg, and water.  Switch to hook attachment, mix it all until forms a dough.  Add butter, and continue mixing until it forms a smooth and elastic dough.  The dough will be rather sticky but should be smooth in appearance.  Place the dough in a greased bowl and cover with a plastic wrap and let proof for 45 minutes or until double in size.

On a floured surface, divide the dough into 6 equal round portions.  Let it rest for 10 minutes.

Roll each portion flat with a rolling pin, then roll it up like a jelly roll.  Let it rest again for 10 minutes.  Repeat this step one more time.

Preheat the oven to 375 degree F for regular loaf pans or 400 degree F for Pullman pans.

Place 3 piece of dough into two greased 9 x 5-inch loaf pans or Pullman pans.  Let it proof for 50 minutes or until it reaches 80% on the loaf pans.  Brush loaves with egg wash if desired.  Cover the Pullman pans with the lids.

Bake the regular loaf pans for about 30 minutes, and the Pullman pans for about 35 minutes.  Take the loaves out of pan right away and let cool completely on wire racks.


Source:  adapted from Cook Bake Love

Thursday, September 15, 2016

Chocolate-Glazed Ginger-Pumpkin Muffins


People gets excited at the beginning of fall season, because they can now order pumpkin spice latte.  I usually don't do that on purpose; if I was in the vicinity of Starbucks and it's a convenient time for me to buy it then I'll buy it.  Most likely I'll forget to buy it when it's in season.  But don't get me wrong, I love pumpkin in baked goods.  My husband and son aren't crazy for pumpkins though, especially in form of pumpkin pie; but if I made it into muffins, pancakes, or cakes, they'll be happy to eat it.


This week I made these muffins and also pumpkin pancakes.  The muffins were all gone but I had the pancakes in the freezer for the weekend.  I didn't use canned pumpkin since I had pulp from homegrown kabocha and blue kuri that my parents grew.  I had them baked until soft so the flesh can be scraped easily.  I think steaming it works too, I've just never tried it.


These muffins are great for after school snacks or even for after dinner desserts.  I'm very fond of crystallized ginger and to add tiny morsels of those on top of the muffins is a brilliant idea.

Chocolate-Glazed Ginger-Pumpkin Muffins


Makes 16 muffins

2 cups all-purpose flour
2/3 cup packed brown sugar
1/3 cup granulated sugar
2 teaspoons baking powder
1 teaspoon ground cinnamon
1/2 teaspoon ground ginger
1/4 teaspoon salt
3/4 cup canned pumpkin
1/2 cup unsalted butter, melted
1/2 cup buttermilk
2 eggs
Chocolate Glaze--recipe below
1 to 2 tablespoons finely chopped crystallized ginger

Preheat oven to 400 degrees F.  Line sixteen muffin cups with paper bake cups; set aside.  In a medium bowl combine flour, brown sugar, granulated sugar, baking powder, cinnamon, ground ginger, and salt.  Make a well in the center of the flour mixture; set aside.

In a small bowl stir together the pumpkin, melted butter, buttermilk, and eggs.  Add egg mixture all at once to flour mixture.  Stir until just moistened (batter should be lumpy).  Spoon batter evenly into prepared muffin cups.

Bake for 18 to 20 minutes or until a wooden toothpick inserted in the centers comes out clean.  Remove muffins from muffin cups; cool completely on a wire rack.

Dip the tops of the muffins into the Chocolate Glaze, allowing excess glaze to drip off.  Place dipped muffins upright on the wire rack.  Sprinkle tops of muffins with chopped crystallized ginger.  Let stand about 30 minutes or until glaze sets.


Chocolate Glaze
In a medium saucepan heat 1/2 cup whipping cream, 1/2 teaspoon vanilla, and, if desired, 1 tablespoon orange-flavor liqueur over medium-high heat just until boiling.  Remove from heat.  Add 6 ounces chopped bittersweet or semisweet chocolate.  Do not stir.  Let stand for 5 minutes; stir until smooth.

To store:  Place muffins in a single layer in an airtight container.  Cover and store in the refrigerator for up to 3 days.


Source:  adapted from Better Homes and Gardens Baking

Saturday, September 10, 2016

Plum Torte


Every year, around the end of August, I will get a basketful of Italian prune plum from a dear friend.  This year would be the last time I get the tree-ripened plums because she won't have access to the tree anymore.  A little sad, yes, because these plums are the best. I love their firm texture and sweet flavor.  I'm saving the rest of the plums that didn't make to the cake in the freezer.


This plum cake is very simple to make but it tastes superb.  The plums turned soft when baked but retained its shaped well.  I don't eat dried prune at all unless it's in a cake but the fresh ones, I will hoard them.  When I bite into a slice, I'm hit with tender crumb surrounding the plums; but the best part was the edges.  They're perfectly crunchy!


I baked this in an 9-inch pan so it was on a thinner side but it didn't affect its appearance.  I enjoy baking a cake like this when it's uncomplicated, can be done in a few hours--just in time of after dinner dessert, and tasty to boot.  This cake has become one of my favorite recipes to bake again and again.


Plum Torte


Serves 8

1 cup all-purpose flour, sifted
1 teaspoon baking powder
Pinch of salt
3/4 cup sugar
1/2 cup unsalted butter, at room temperature
2 large eggs
1/2 teaspoon almond extract, optional
10 to 12 Italian prune plums, pitted and halved lengthwise
Turbinado sugar and ground cinnamon for sprinkling

Heat the oven to 350 degrees F.  Whisk together the flour, baking powder and salt in a small bowl and set aside.

In the bowl of a standing mixer or handheld beaters, cream the sugar and butter until very light and fluffy.  Scrape down the sides of the bowl with a spatula.

Add the dry ingredients and the eggs all at once and the almond extract, if using, and beat until combined, scraping down the bowl once or twice.

Spread the batter into an 8 or 9-inch spring form pan.  Arrange the plum halves, skin side up, on top of the batter in concentric circles.  Sprinkle the batter and fruit lightly with turbinado sugar and cinnamon.

Bake the torte for 40 to 50 minutes, until a toothpick inserted into the middle of the cake comes out clean.  Cool the cake in its pan on a rack for 10 minutes, and then release the spring and let it finish cooling just on the base.  Once it's cool, serve as soon as possible.  Or, you can double-wrap the torte in foil, put it in a sealed plastic bag and freeze (for up to one year).

Note:  to serve a torte that has been frozen, defrost it completely and then reheat it for 5 to 10 minutes in a 300 degrees F oven.


Source:  adapted from Food52